
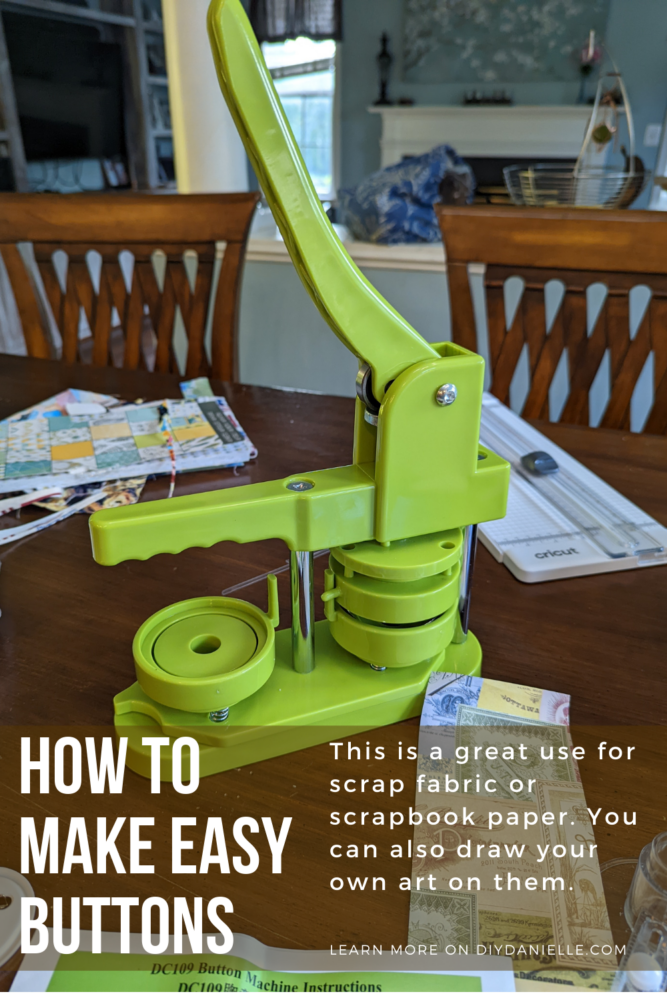
Learn how to make buttons with a button making machine. This is a great way to use scrap fabric or paper to make custom round pins!
My kids made buttons at the grand opening of our library’s Maker Space, but I haven’t actually seen a button making machine before… I missed that because I was eyeballing the 3D printers and laser cutters. But they told me how easy it was and when a company on Amazon asked me if I wanted to test their button making machine, I said SURE. I usually only review the products on Amazon, but this was too much fun not to share.
This post may contain affiliate links which may earn me commissions should you click through them and take certain actions. As an affiliate for Amazon, Cricut, xTool, Home Depot, and other sites, I earn from qualifying purchases. Please DIY carefully. View my full legal disclosures here.
The majority of my content is generated by me, as are 99% of the photos and videos, but I utilize technology for titles, descriptions, video editing out all of my ums, and occasionally for text overlay on images.
Please read the whole post so you don’t miss any important information!
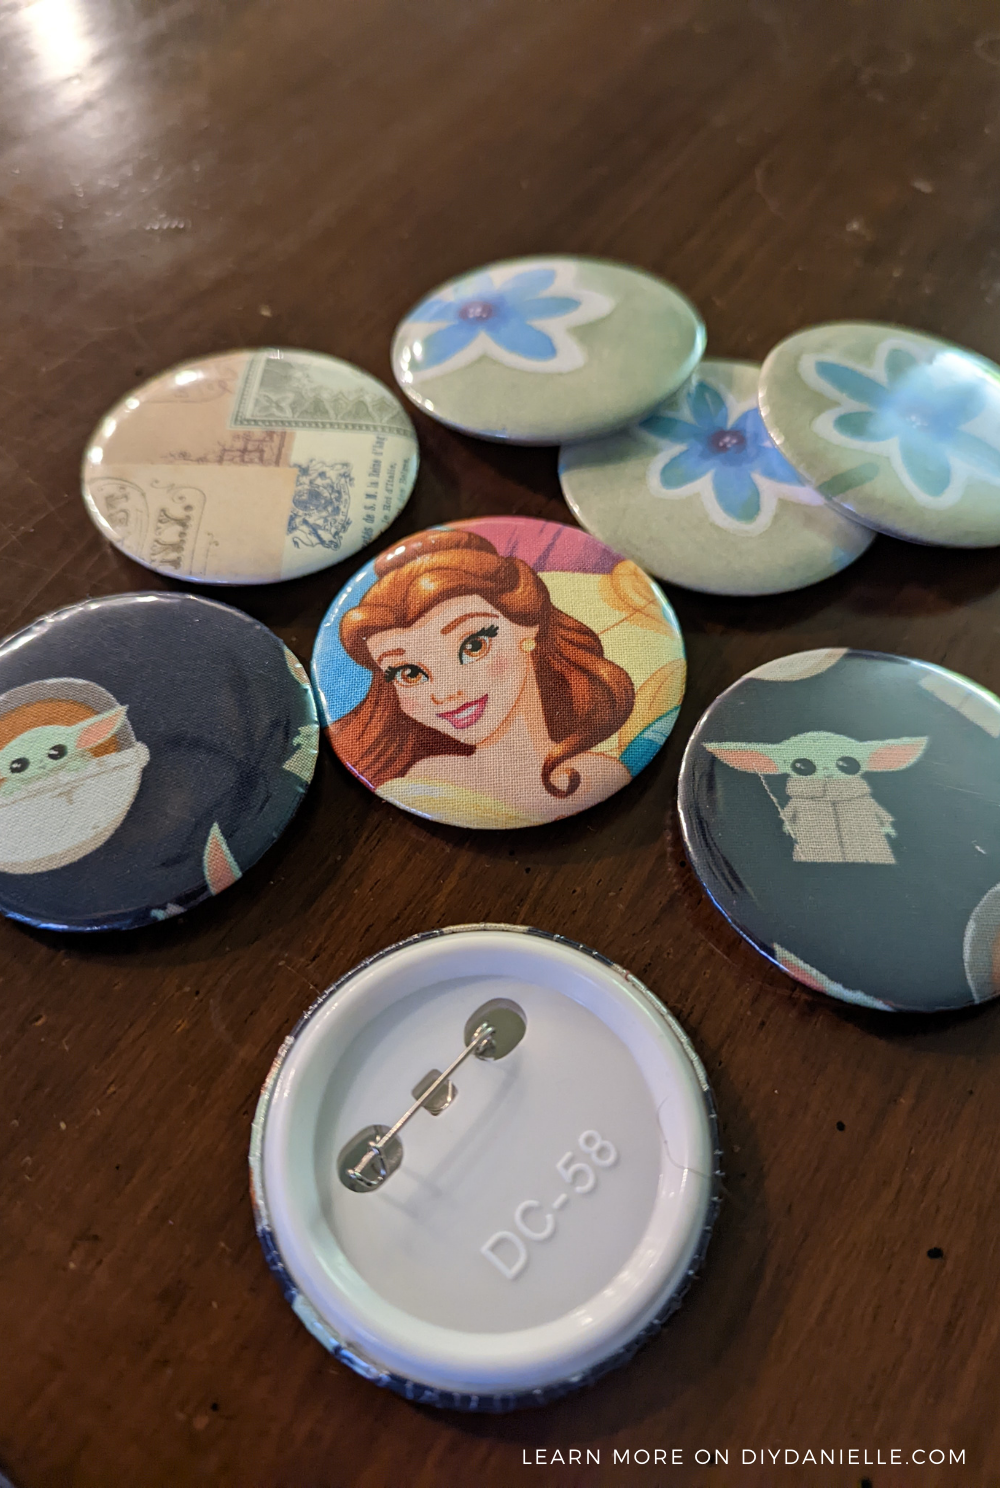
These button makers are a great way to make custom round pins for family, friends, or to sell in a small shop. They’re also a great use for scrap fabric or paper.
DIY Buttons: Custom Round Pins with a Button Making Machine
Supplies:
- Button Maker Machine: https://amzn.to/39Gnf00 (comes with supplies for 200 buttons)
- Supplies for 100 Extra Buttons: https://amzn.to/3Ot2jIx
- Scrapbook paper, your personal art, or scrap fabric
- Optional: 100 Pocket Mirror Supplies: https://amzn.to/3xDowwN
Note: This button maker broke after a lot of use… I am not sure if I got a faulty one or if it just wasn’t as well made, but I replaced it with this button making machine. The design on the newer machine seems to be less prone to breaking, but in fairness, I used the original button maker a LOT so it could just be a wear and tear issue.
Step 1: Cut Your Design
Cut our your fabric or paper in the size that your button maker suggests. In the case of this button maker, they included a rotary cutter to use, but I use it to draw the circle on the fabric/paper. Then I cut it out by hand. If you use the rotary cutter, make sure to use a cutting board underneath it.
If you have a Cricut machine, I think you could set it up to print and cut to make your life easier.
Cutting by hand, however, lets you use small pieces of paper or fabric, cutting them out exactly over the design you want on your pin.
For those who are artistically inclined, you can design your own button images, either by drawing them by hand or by using an app such as Canva. Just keep in mind that with this particular button making machine, your full circle needs to be 70mm, but the design needs to be 58mm. The excess folds around the edge of the pin.
Step 2: Place your metal top in the button making machine, top up.
Step 3: Place your circle, image face up, on top of the metal piece.
Step 4: Take your circular film, ensuring you only get one slip, and place it on top of your design.
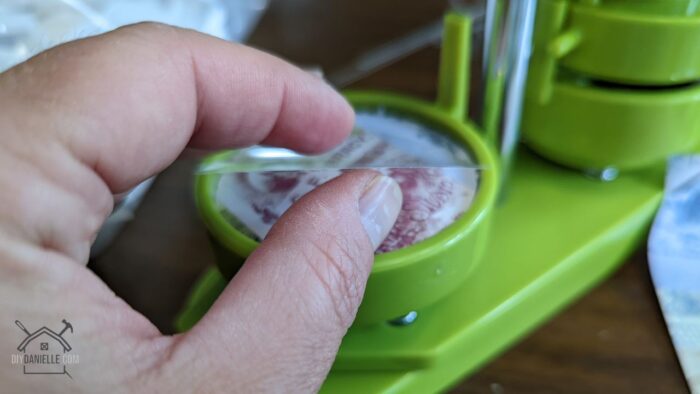
Step 5: Press the button maker closed firmly. When you release, you shouldn’t see your design any more.
Step 6: On the opposite side of your button maker, insert your button back. The indentations around the border of the circle should be face up.
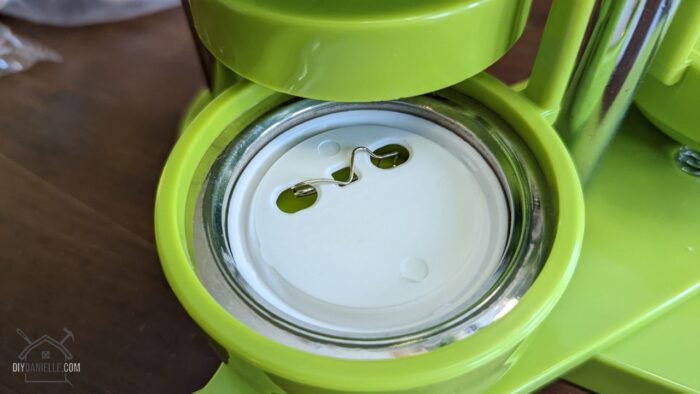
Step 7: Flip the button maker around and squeeze tightly. This should combine the pieces from the first squeeze with your back.
Step 8: Remove your finished button.
You can store your buttons on a strip of fabric or on ribbons! These came out so cute!

Custom Button Designs in Canva
Want to make some custom printed buttons? I made quite a few in Canva. I print, then cut them out with scissors, then I add them to buttons. I LOVE how they came out.
You can choose to print on Printable Area if you don’t want any of the design cut off.
Want to buy one of these pins instead of making them? You can buy Affirmations Pins in my store!
Please share and pin this post! You can also post your project and tag the DIYDanielle team on Instagram @doityourselfdanielle!
Google Web Story: How to Make Buttons