DIY guide for making felted ornaments with simple tools and customizable designs. Create cute, durable holiday decor for gifts or your tree.
I love felting, but I don’t have the endurance or perseverance for felting large items.
That’s why felting ornaments is such a great idea. It’s small and satisfying to do and they make great gifts.
They also don’t break if you drop them, woohoo!
If you’re new to felting, check out: https://diydanielle.com/how-to-needle-felt/.
This post may contain affiliate links which may earn me commissions should you click through them and take certain actions. As an affiliate for Amazon, Cricut, xTool, Home Depot, and other sites, I earn from qualifying purchases. Please DIY carefully. View my full legal disclosures here.
The majority of my content is generated by me, as are 99% of the photos and videos, but I utilize technology for titles, descriptions, video editing out all of my ums, and occasionally for text overlay on images.
Please read the whole post so you don’t miss any important information!
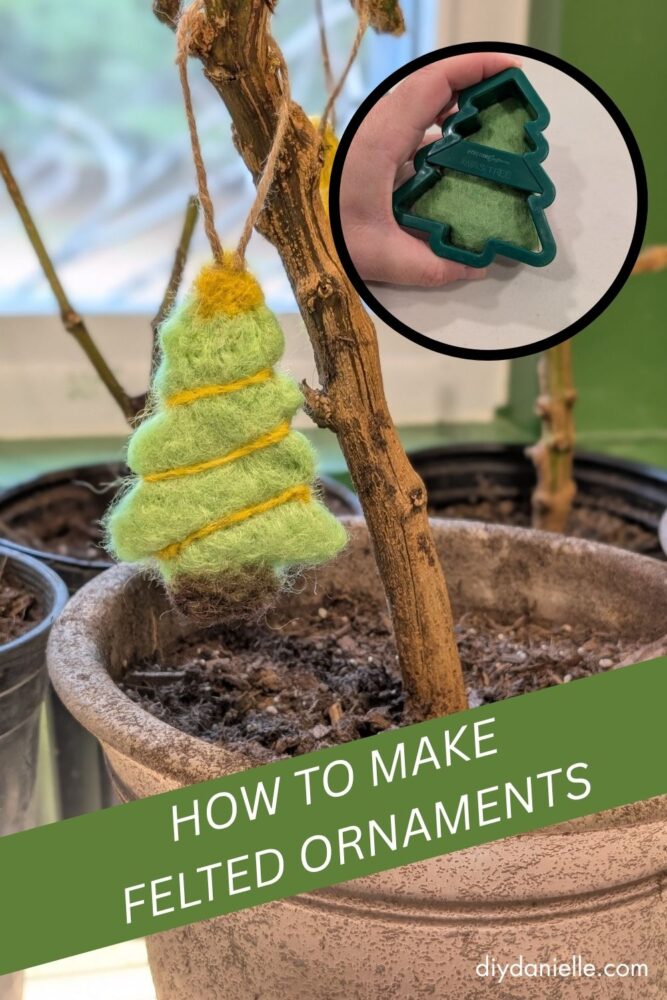
DIY Felted Ornaments
Project Supplies
- Wool roving (the fluffy wool): https://amzn.to/40dE9dy
- Felting needles (barbed)… you’ll get a bunch in this felting kit: https://amzn.to/44NfGNs
- Foam pad or felting mat (to work on): https://amzn.to/4kESO90
- Cookie cutters- simple is best
Step by Step Instructions
Step 1: I like to start with some sort of cookie cutter that is in the shape of a simple Christmas type design.
You can use a snowman, a snowman, a star, or a Christmas tree.
You can obviously freehand this stuff, but it depends on your skill and the complexity that you are able to complete.
A snowman would be pretty easy to freehand if you made three balls of natural wool and felted them on top of each other.
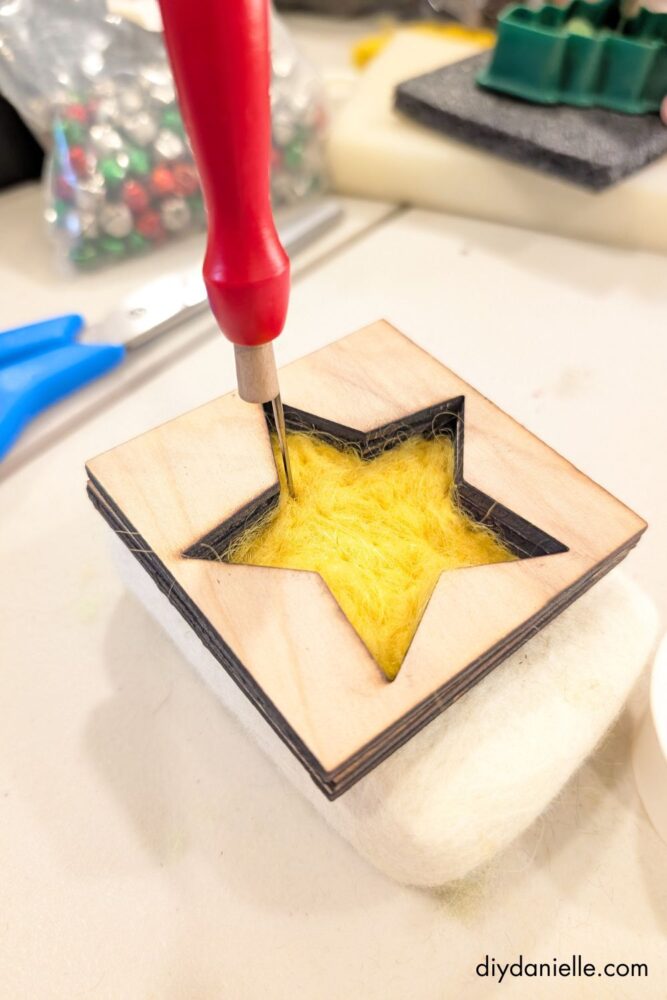
I really like having a cookie cutter for designs like the Christmas tree or star which have sharp angles.
I generally use cookie cutters from my baking supplies, but the wood cookie cutters that you’ll see are made from my laser cutting machine. I was cutting out the shapes in the middle for a project. I added a square cut around the design so I could use them for stencils or felting. I like using a few layers of wood and gluing them together because it makes a nice thick stencil.
Step 2: Place your cookie cutter on the felting pad. You want to make sure that if there is a bar across it, that it is face up.
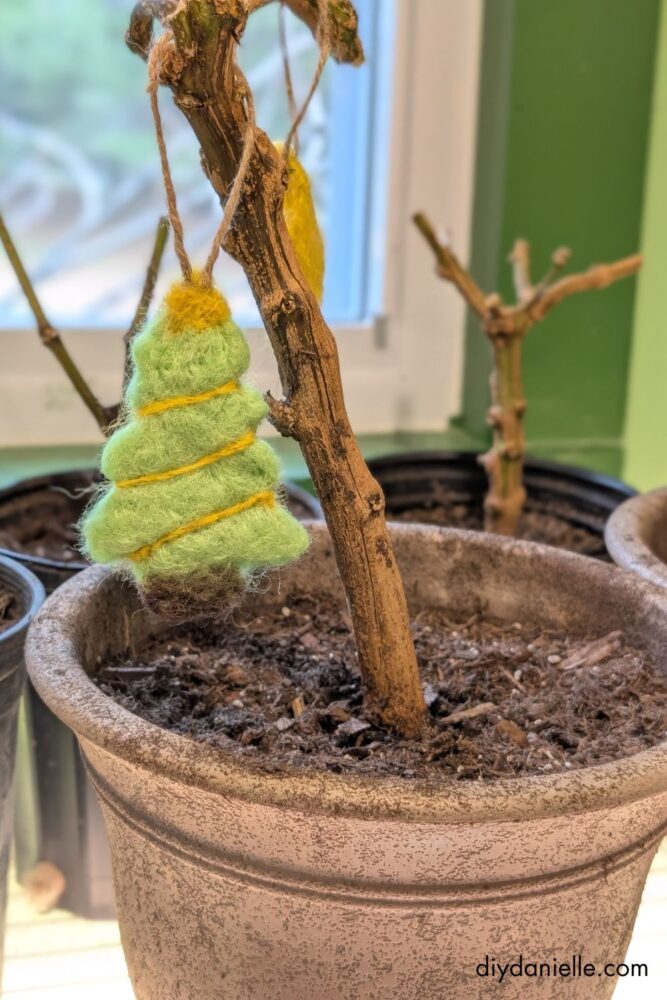
Choose the color you want for your base. For my Christmas tree, I did all green and then later felted the trunk of the tree as brown. For my star, it was all yellow.
Choose the roving color that you want and push it into your cookie cutter.
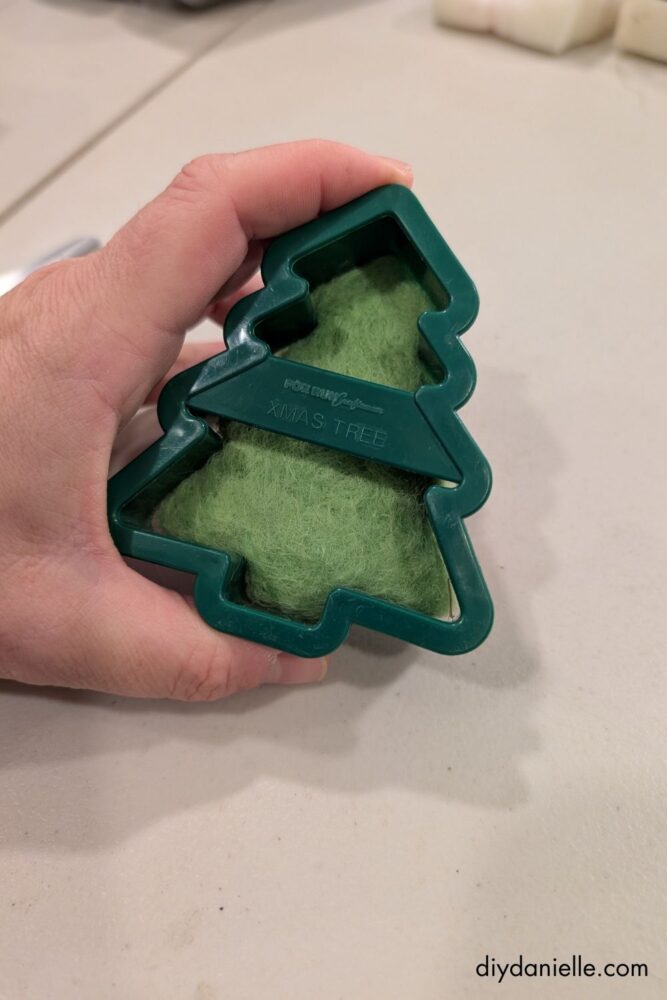
Step 3: Use a felting needle to start felting the wool roving in the shape of your design. Don’t hit the cookie cutter, but use it as a way to contain your roving within that space. Stab stabby stab!
If the needle gets dull, make sure to replace it. The sides of the needle should be rough… that’s the part that’s doing most of the work!
Continue to felt until you feel like the piece is pretty solid. I like to remove the cookie cutter occasionally and pull the ornament off the felting pad so it won’t get felted into the pad.
Once the main shape is complete, you can remove the cookie cutter.
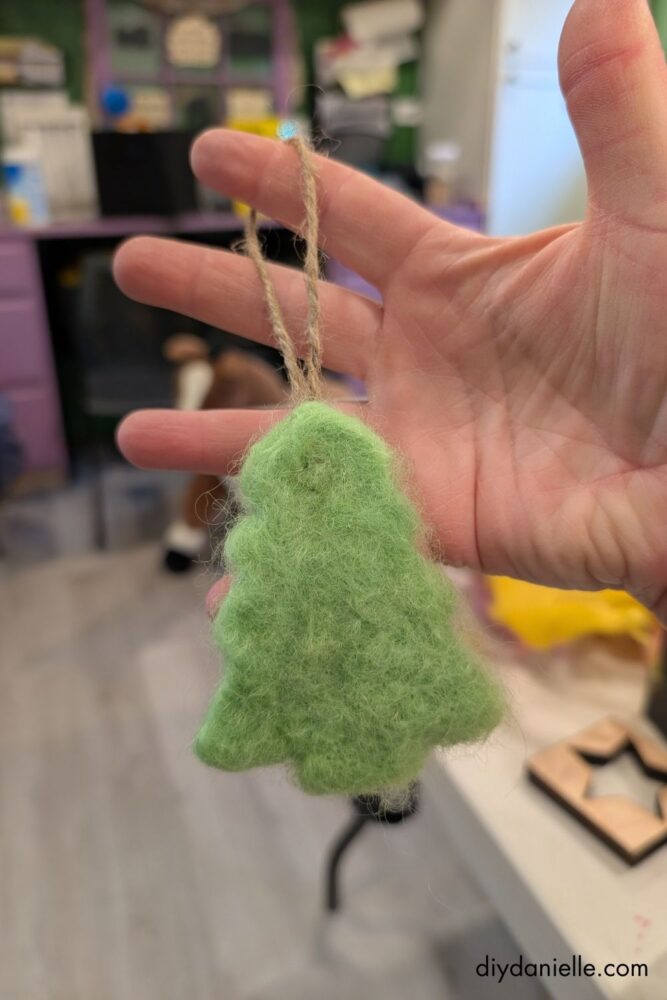
Step 4: Now you can add your details. I felted brown roving over the green of the trunk of the tree. I also felted a little piece of yellow at the top for a Christmas tree star.
Step 5: I took long pieces of yellow roving and twisted them into a thin rope, then felted that as the Christmas lights for my tree.
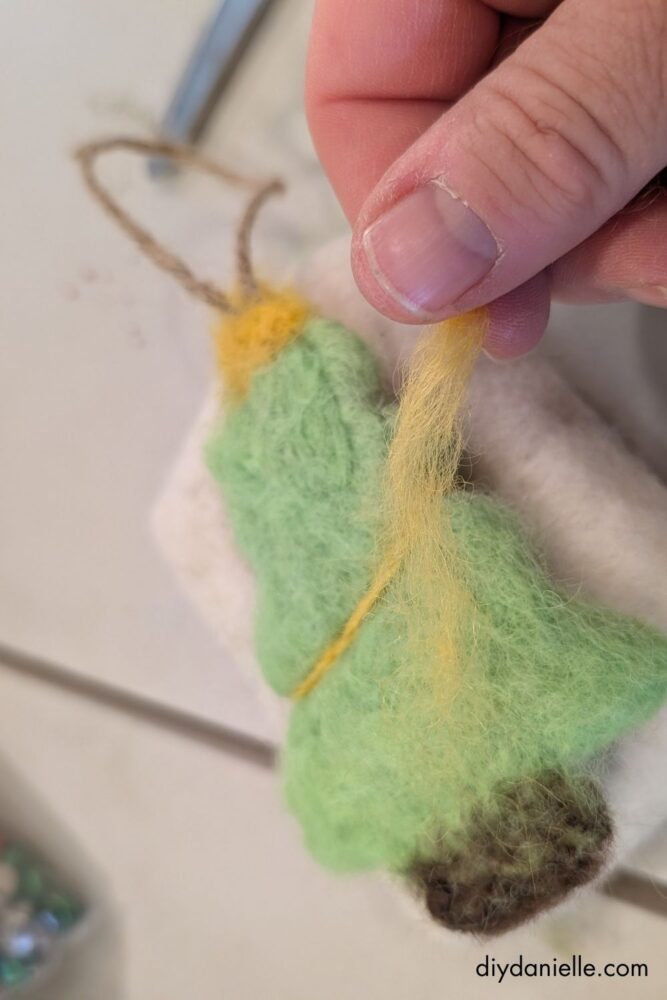
Step 6: For the ornament string, I flipped the ornament over and placed my string on the back. I added a little bit of green felt over it and felted that on top of the string. This holds the string in place. You might need to do a few layers of green roving.

You could probably do this during the part of the process where you’re using your cookie cutter, but I struggled to get it in there properly. This was a little bit easier.
Step 7: Last, I just used some sharp scissors to trim any of the fuzzies off. This just makes it look a little nicer.
Please share and pin this post! You can also post your project and tag the DIYDanielle team on Instagram @doityourselfdanielle!