Build a simple and effective outdoor cover for your litter box. Keep your yard neat and protected with this quick DIY project anyone can complete easily.
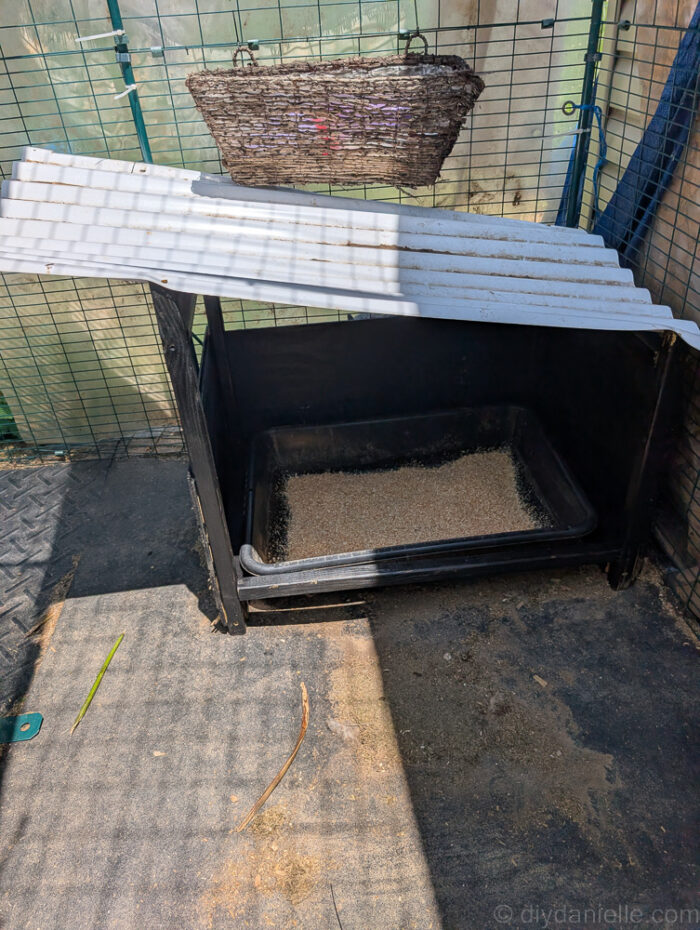
Our rabbits have a shed that they share with the guinea pigs and a lovely outdoor area. We have a litter box for them inside and one outside, but we’ve had issues with rain getting into the litter box and making it a complete mess. While adding drainage hole is a good idea, we just didn’t want water in the box to begin with- so I created a nice cover over the litter box. This structure is low key, allows the use of a small concrete mixing pan for the litter box (nice and durable), and keeps both the bunnies and the litter dry (from rain anyways)!
This post may contain affiliate links which may earn me commissions should you click through them and take certain actions. As an affiliate for Amazon, Cricut, xTool, Home Depot, and other sites, I earn from qualifying purchases. Please DIY carefully. View my full legal disclosures here.
The majority of my content is generated by me, as are 99% of the photos and videos, but I utilize technology for titles, descriptions, video editing out all of my ums, and occasionally for text overlay on images.
Please read the whole post so you don’t miss any important information!
DIY Litter Box Cover for Outdoors
Project Supplies
- 2x2x8 https://homedepot.sjv.io/mgQdBZ
- T-11 scraps: I used a mix of both 11/32 and 19/32 so I could avoid buying supplies. 11/32 is cheaper and makes for a lighter structure though!
- T1-11 11/32″ 4×8 sheet https://homedepot.sjv.io/LPQZm3
- T1-11 19/32″ 4×8 sheet, primed https://homedepot.sjv.io/POqZ7M
- Screws
- Scrap roofing
- Measuring tape
- Black barn paint
- Ryobi Drill https://homedepot.sjv.io/a1EdkQ
- Concrete mixing tub, medium https://homedepot.sjv.io/yqx5YB
Step by Step Instructions
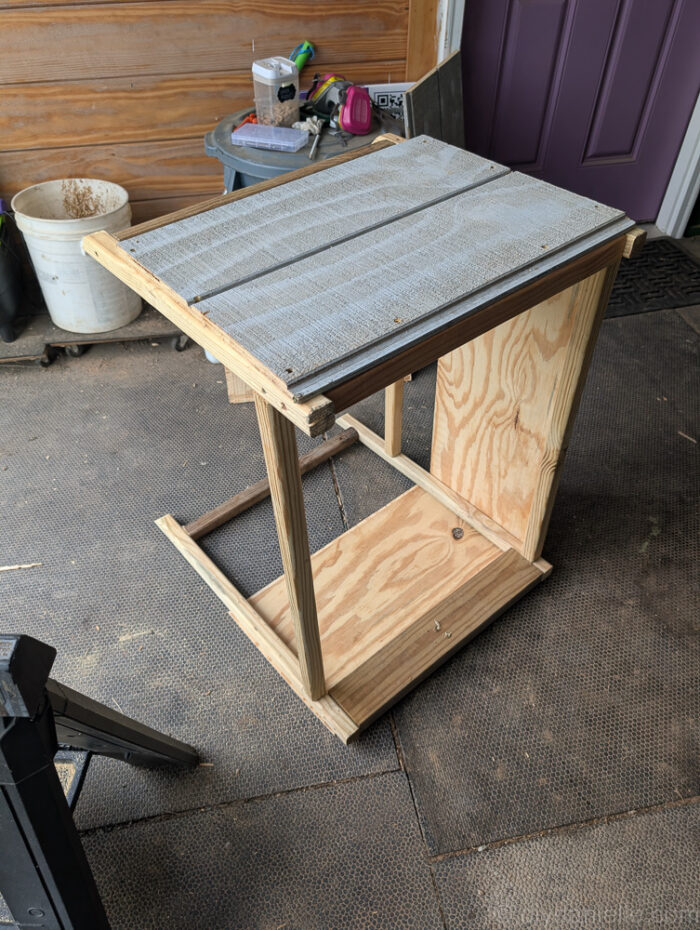
Step 1: To begin my project I measured my litter box. I wanted something that could surround it but still allow me to easily take the litter box in and out for cleaning.
I used 2x2s to build the frame. I started with the two short sides. I realized after that I probably could have angled it along the long side, but I chose the short sides. You’ll notice that the 2x2s are cut at the top at an angle. This allows me to add the roof at an angle so water can slide off and won’t pool on top. This is really important because the scrap roofing panel I used is pretty lightweight and wouldn’t handle any sort of snow load or water load. It would definitely leak as well.
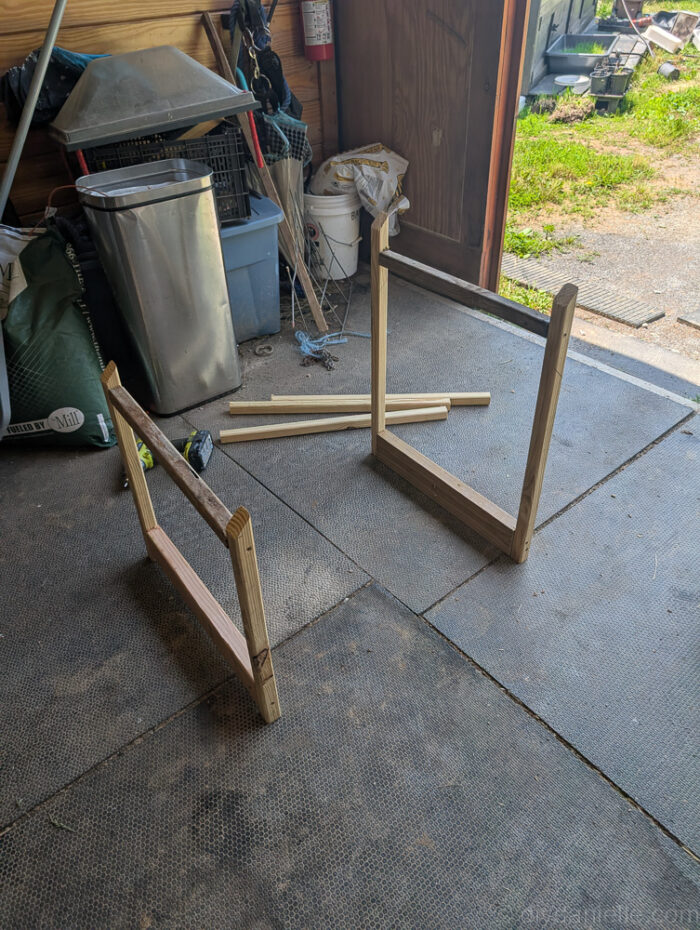
Step 2: I placed my litter box between the two pieces to make sure that the longer sides will be the correct length.
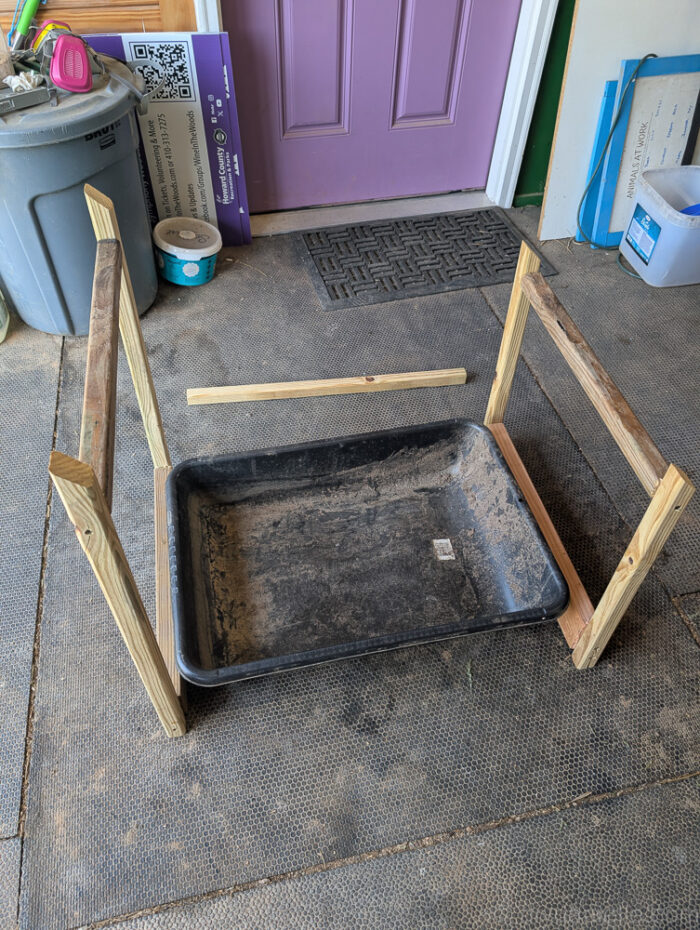
It all looked good so I cut and attached my two pieces for the back long side, and the bottom support for the front long side.
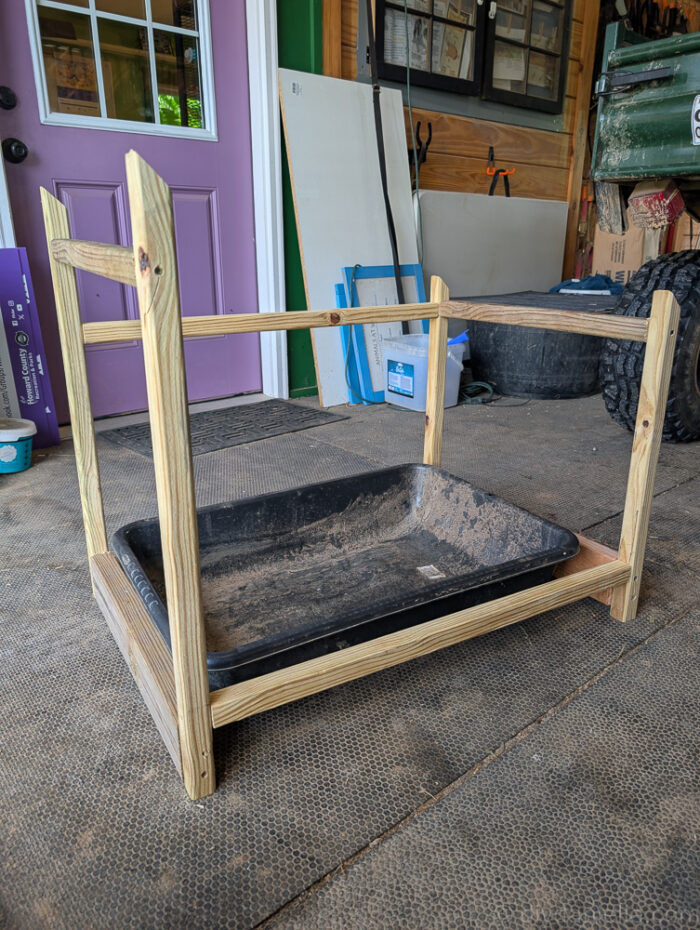
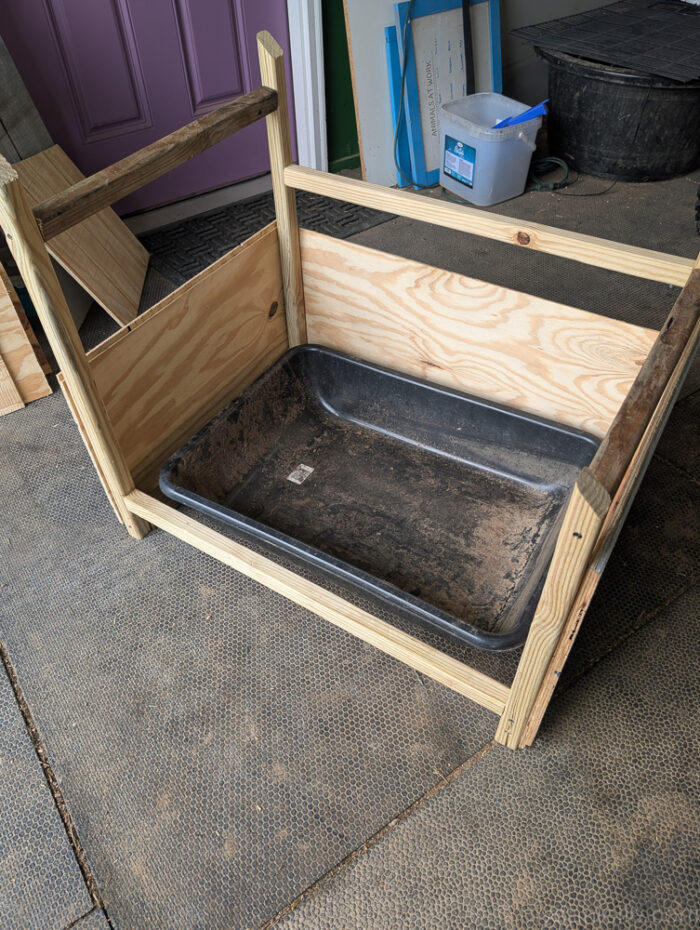
Step 3: I had some scrap T-11 leftover from other projects so I use those pieces for siding. This was not enough to cover the entire side which might have looked nicer. The benefit though is that air/breeze can get in and out of the litter box enclosure, but it’s still high enough to prevent most of the rain from getting in.
Here’s another photo from the opposite side.
Step 4: After this I had my son paint it.
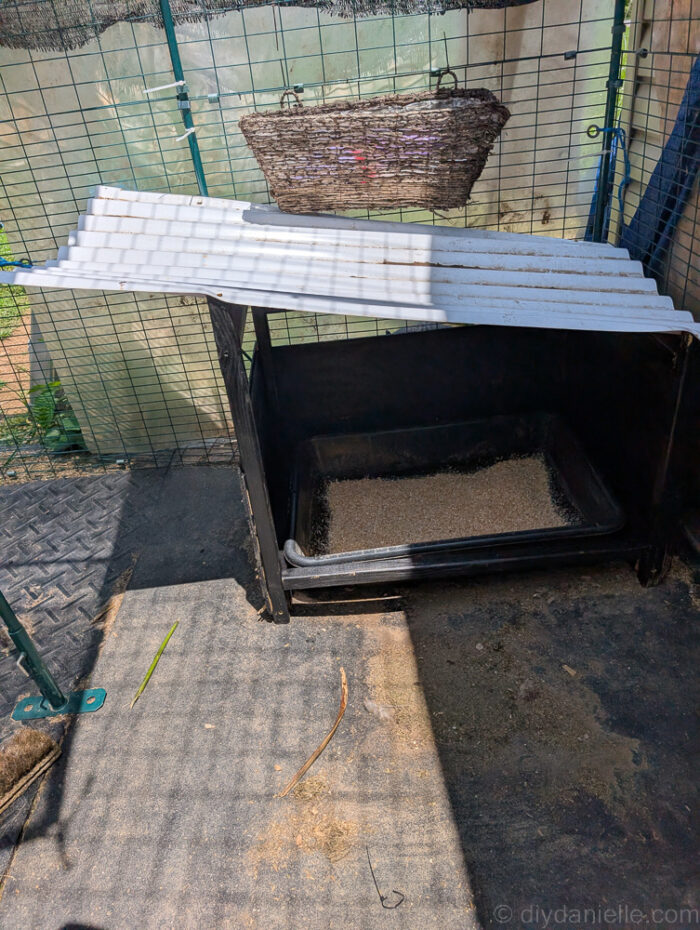
Step 5: Once it was dry, I added the roofing panel and the litter box.
Ideally, I probably should have added a small piece of plywood under the roof panel for additional support. But I’m not really concerned about the roof caving in (the plastic is super lightweight) and I didn’t have a big enough scrap.

Please share and pin this post! You can also post your project and tag the DIYDanielle team on Instagram @doityourselfdanielle!