
Turn cherished flannel shirts into keepsake pillows! These upcycled memory pillows are a heartfelt way to preserve loved ones’ clothing and create lasting mementos.
This post may contain affiliate links which may earn me commissions should you click through them and take certain actions. As an affiliate for Amazon, Cricut, xTool, Home Depot, and other sites, I earn from qualifying purchases. Please DIY carefully. View my full legal disclosures here.
The majority of my content is generated by me, as are 99% of the photos and videos, but I utilize technology for titles, descriptions, video editing out all of my ums, and occasionally for text overlay on images.
Please read the whole post so you don’t miss any important information!
DIY Memory Pillows
Project Supplies
- Flannel shirts from your loved one.
- Pillow form: https://amzn.to/41gxkZY
- Sewing supplies such as a sewing machine, scissors, etc.
- Laser Engravable Patches: Blue, Brown
- xTool M1 Laser Cutter http://shrsl.com/3v9vq
- Honeycomb Riser http://shrsl.com/3yxwg
- Air Assist http://shrsl.com/3yxv6
Step by Step Instructions
Step 1: The first thing I did was to engrave my Dad’s handwriting onto a laser engravable patch. This is not necessary but it’s a nice touch. I’m a little concerned with how the pillow covers will wash in the washing machine so I may want to hand wash these.
Step 2: Your process is going to be dependent on how you make your pillow. It’s very easy to make a pillow with just the front and back of a shirt.
When you start adding quilting blocks, it gets a little bit more complicated, but it’s still a simple process.
You need to start by measuring the pillow that you’re going to be using and covering.
My pillows are 16×16 in square. I added a 1/2-in seam allowance to each side which means that my final two pieces for my pillow need to be 17×17 in.
If you’re cutting a bunch of squares, you want them to all measure up to 17×17 once they’re fully sewn together.
You want to plan ahead for anything that you want to keep such as pockets because otherwise they may get cut off when you sew the pillow closed.
Step 3: Sew Your Pillow
Pillow 1: Black with a Heart Shape
With my first pillow, I wanted it to be fairly simple because that is more my brother’s style. I cut the front of a black flannel, ensuring that the buttons are down the middle so that we can use those to remove the pillow.
I also cut a matching piece from the back of the black flannel shirt for the back.
I cut out a heart shape in a blue flannel piece and sewed the patch on top using a zigzag stitch to make sure that the fabric hopefully won’t fray.
Then I used fusible interfacing to attach the heart to the shirt. Make sure to cover up your patch so it doesn’t get damaged from the heat. I wasn’t sure how well it would stand up to heat directly on the patch.
I zigzag stitched the heart to the front black pillow panel.
Afterwards, I simply faced the two squares right sides together and sewed them together with a straight stitch. You don’t need to leave a gap to turn them right sides out because you will have the buttoned area to use.
Afterwards, all you need to do is unbutton it, turn it right sides out, and add your pillow and button it back up.


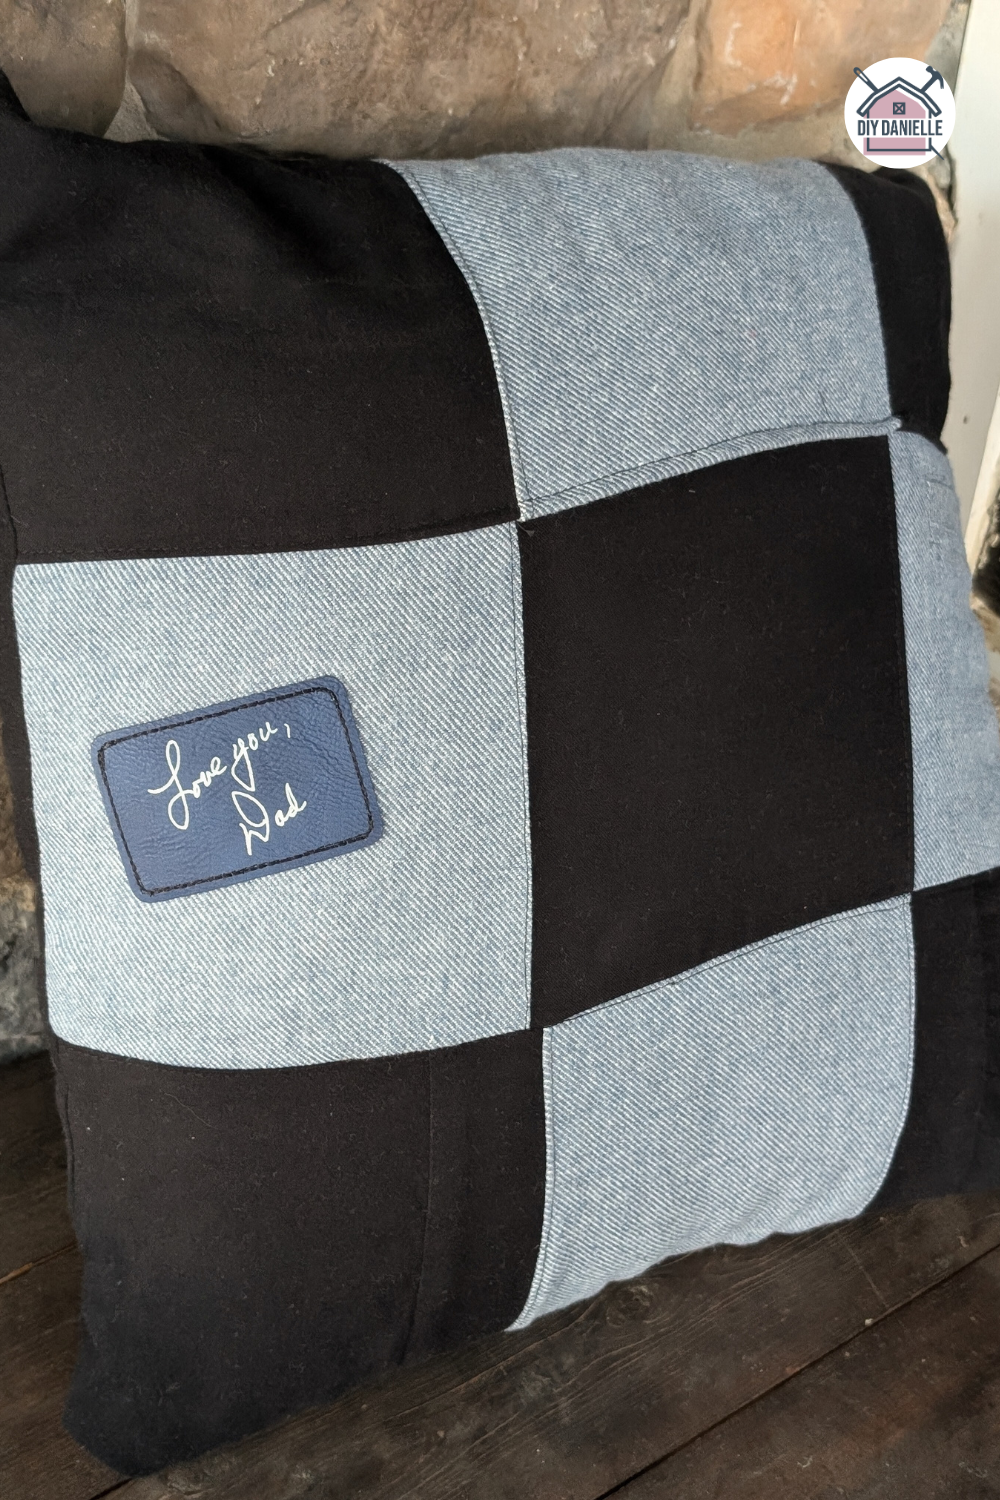
Pillow 2: Squares
For the second pillow I wanted to use a couple different pieces of fabric.
For the back, I used the buttons area from a plain blue flannel shirt and left over fabric from the black shirt. This allowed me to offset the button area to one side. And it creates a different look for this pillow.
For the front of the pillow, I used a bunch of different squares that I cut to the same size. I sewed each square right sides together to the other ones row by row. Then I flipped them and top stitched.
Afterwards I ironed on the patch and top stitched it using a zigzag stitch.
Then all I needed to do was put the two squares right sides together, sewed them up, open them via the button area, and flip them right sides out to put my pillow in.


Overall, this is a really easy project, just a bit heart-wrenching if it’s for your own loved one.
There are lots of ways to mix and match how you do these pillows. You could do stripes, or other shapes, or do some significant quilting if that’s skill. I wanted something simple and easy.
Please share and pin this post! You can also post your project and tag the DIYDanielle team on Instagram @doityourselfdanielle!
