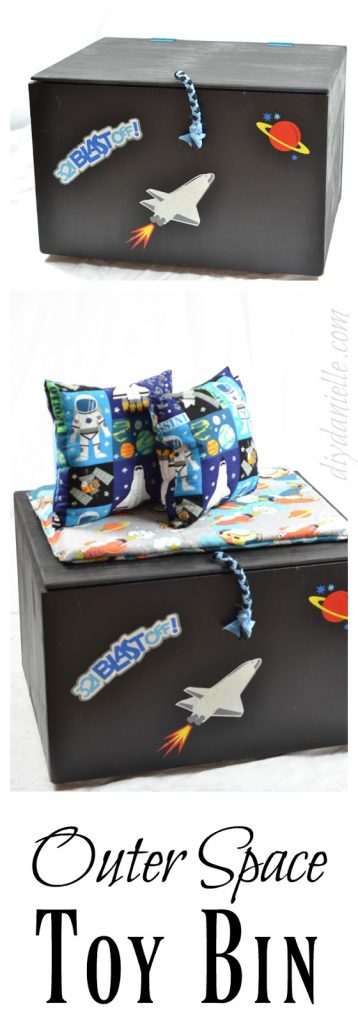
How to create an outer space toy bin using a Homeright Finish Max Sprayer, Pitch Black Old Fashioned Milk Paint, Polyurethane, and some Silhouette or Cricut designs.
Sponsorship Disclosure: Some or all of the hosts of The Fab Furniture Flippin’ Contest receive monetary and/or product compensation from the sponsoring brand, HomeRight, in order to complete their themed projects. HomeRight will also provide the prize package for the contest winner. This post may contain affiliate links. Using these links helps support my blog. Thank you!
I think I have been working on my sons’ outer space themed bedroom for over a year at this point. It has NOT been the priority and it’s become this unfinished project that irritates the heck out of me every time I think about it.
I try not to think about it.
As part of this organization series, I wanted to finally get myself together and FINISH this room. Hopefully I’ll get to it. But yay, I finished a storage bin for it! That’s something, right?!
Supplies Supplies listed below may include affiliate links to the products.
- Home Right Finish Max Sprayer
- Pitch Black: Old Fashioned Milk Paint
- Polyurethane
- Spray paint for the hardware (or get pretty new hardware)
- Scrap Fabric
- Silhouette Cameo and 651 vinyl
Use the Discount Code DIYDANIELLE on cricut.com for 10% off any cutting machine or heatpress (no minimum). Excludes: materials/accessories/mystery boxes/etc. Applies to US/CA only, code expires 12/31/23.
Tutorial
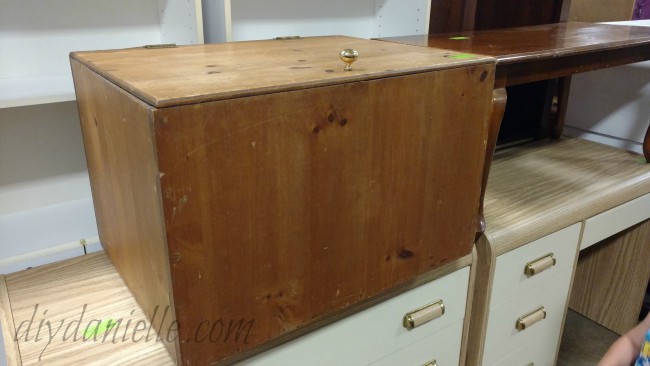
So I found this box cheap at the Restore. I have no idea what its original use was… it looked like a giant bread box to me. I impulse bought it and it’s been sitting in my garage for months, ticking my husband off.
He’s been raging about it forever and I keep telling him how amazing it is and all the wonderful things I want to do with it.
He was NOT sold.
Fortunately for him, I decided to enter the Fab Furniture Flippin’ Contest and I needed a piece of furniture to paint.
This forced my hand at actually making up my mind about how to use this. Very briefly, I had decided to make a guinea pig cage from it and “sell it,” then I decided to make it into a tool chest. The kids’ room needs finishing though.
So for the contest I need to use the featured item of the month. In this case, it was the Homeright Finish Max Sprayer. I won’t lie… I was pretty psyched. Anything that saves me time wins the day. This thing is amazing and easy to clean which was a huge selling point. I still am working on getting a hang of using it for milk paint and getting the spray speed right. The first go with the paint was rough, but by the time I used it for the poly, I had the hang of spraying it better.
Okay so my process.
I started out by mixing up some Pitch Black Old Fashioned Milk Paint (OFMP), adding extra water for use in the sprayer. Once mixed, I sprayed the entire bin, inside and out. I didn’t have quite enough OFMP in the pitch black so I used a coordinating spray paint that I had on hand for the underneath of the lid and for the hardware.
Gosh I love spray painting.
This is where I tell you to do as I say, not as I did. Once your paint dries, you want to apply polyurethane to your piece. I waited until I added my vinyl and it wasn’t pretty. You don’t want to put poly over your vinyl. There’s lots of ugliness.
Let the polyurethane dry completely. I really wish I’d had this sprayer when I did my kitchen table flip. That project was a major pain in the tush to poly by hand.
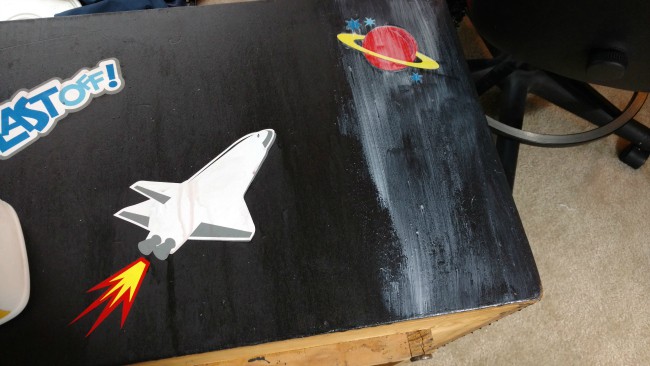
In an alternate universe, I then used my Silhouette machine to print out a multi layer outer space image that I found in the store. I used 651 Permanent Vinyl for it and used transfer paper to get it all on properly. Or mostly properly. It was my first time doing multi colors/layers and it was interesting.
 |
| The NASA logo (or my attempt at replicating it) is for the spaceship bunk bed. Coming… eventually. If I finish it before the boys outgrow their outer space stage. |
 |
| This would have been shiny if I’d applied polyurethane before starting my vinyl. But here’s the process photo from layering the vinyl. I had the gray piece, the white piece went over it, then I added the letters on last. A bit challenging but very pleasing to do. |
Now I just applied a layer of mod podge over the front of the bin to cover the 651. I don’t like how vinyl can peel from wood and I think mod podge keeps it from peeling as easily. If you commit to doing it over the vinyl, you need to do that whole side though because it gives it an additional sheen sometimes.
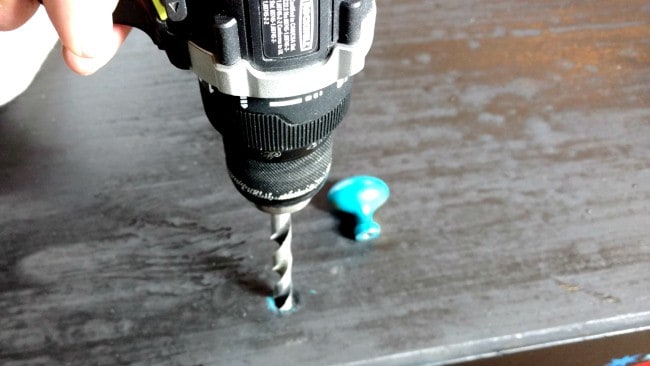
I replaced all of the hardware, with the exception of the knob. I decided it was ugly.
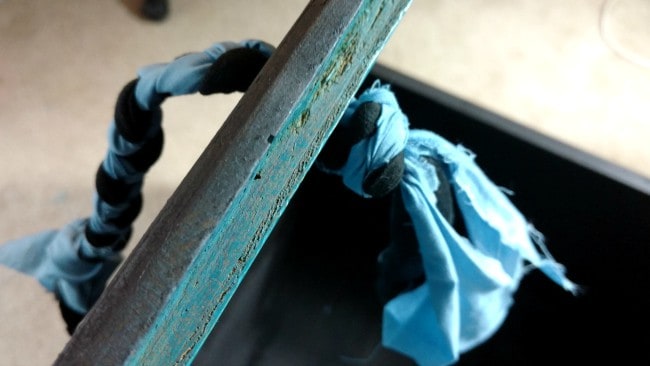
I made the hole where the knob went wider using a drill bit.
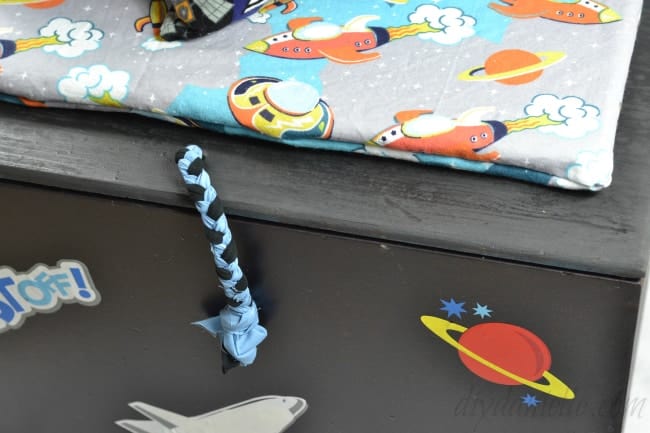
Instead of the knob, I took a few pieces of thin scrap fabric and tied a knot in one end. I braided the fabric together for a few inches, then fed the unbraided ends through the hole. Once I did that, I continued the braid a bit on the bottom, then added a knot to the bottom. Finished!
I added a couple of pillows and padded seating to the top of the bin so it could also be used as a seat in the spaceship bed. Tada!
Love it? Pin it!
The Fab Furniture Flippin’ Contest
Make sure to read more about this month’s Fab Furniture Flippin’ Contest: Spray It Pretty.
Interested in participating in the Fab Furniture Flippin’ Contest? Interested bloggers should contact [email protected] if interested in participating in future contests.

More from the Organization Series:
Thanks for taking the time to read this post! I really appreciate the time you’ve taken. Please share, like, and pin my post if you enjoyed it. Follow me on social media and subscribe to my email list to keep up to date on all of my latest projects!