

These living room storage cabinets help keep the space organized, offering storage for toys, movies, and more. We love that the living room cabinets have doors, keeping things out of sight so the room won’t look cluttered.
This post may contain affiliate links which may earn me commissions should you click through them and take certain actions. As an affiliate for Amazon, Cricut, xTool, Home Depot, and other sites, I earn from qualifying purchases. Please DIY carefully. View my full legal disclosures here.
Please read the whole post so you don’t miss any important information!
One of the hardest parts about selling our old house was leaving behind our gorgeous built-in entertainment center. We packed up all of the books and DVDs that we’d been storing it in, along with the decor, and when we got to our new house… well… the stuff got shoved into the storage area, still in boxes. We still haven’t unpacked those things, but we’re slowly working to complete full built-ins in our living room at the new house.
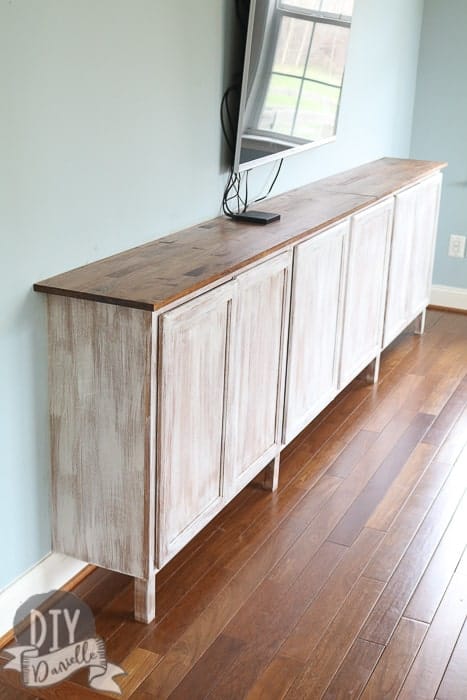
To begin, we added cabinets with doors for storage. This is how we began our last entertainment center project as well. The difference in the two projects is that we added a base the first time.
This time we kept it raised off the ground so it’s easy to sweep under- and so we don’t need to do anything crazy with the baseboard.
I think the most time consuming part of the project was painting the cabinets. I love the custom look and pretty cabinets from the custom cabinet companies are suppppppper pricey. This project cost us almost nothing because we used some gift cards we had.
This post is part of this month’s At Home DIY Challenge. Our theme this month is DIY Home Improvements. All of the participating bloggers do their own home improvements and share them. Make sure to check out all of the other fun ideas. March was the Upcycle Thrift Store Challenge and February was the Build to Organize Challenge.
Supplies
- Stud finder
- Level
- Screws
- Cabinets: You’ll want something like this, but they have different types of wood and different sizes so pick what works for your space.
- Side pieces for the two end cabinets
- Scrap wood for the feet and something to attach them
- Wood for countertop
- Kreg Pocket Hole System
- Stain / Paint / Polyurethane: I used white paint and my stain is Minwax Red Mahogany.
- TV Wall Mount
- Optional: In Wall Cable Management System
How to Add Living Room Cabinets for Storage
Choosing Cabinets
This is not a difficult project. The cabinets that you buy for the top level of your kitchen work well for shallow built-in storage that doesn’t take up a lot of space. I could have used bottom kitchen cabinets, but they’re really deep and really swallow up the living room floor space. I don’t love that. The top cabinets fit books or DVDs just fine.
We mapped out the space and worked out what width cabinets would fit. Originally, I considered putting them from the step all the way to the window, but I just couldn’t see to find the right way to make all of those cabinets fit.
So instead we planned out how to make a long strip of cabinets that would be centered on the wall with the TV centered over it. The cabinets on either end needed to be the same size because when we add bookshelves, we will make the shelves the same width as those cabinets. This meant that the two center cabinets needed to be the width of our TV or larger.
The main issue that I had is that I like to work with unfinished cabinets. I’m not sure how easy it would be to work with the stock cabinets that are already stained and I don’t want to sand. I HATE SANDING. The in-store selection for unfinished cabinets is generally pretty poor and you’ll only have a few choices.
Also, for what it’s worth, I feel like the quality on store bought cabinets has gone down a lot in the past few years. Am I wrong? Were they always bad? I thought our old entertainment center held up pretty well but the cabinets we got for our built-ins in the office were horrible.
Hanging the Cabinets
When it comes to hanging the cabinets, you’re just finding a stud and screwing them in. It’s fairly basic. You’re just following the instructions for hanging a top cabinet, but hanging the cabinet closer to the ground.
You’ll want to ensure that your cabinets are level.
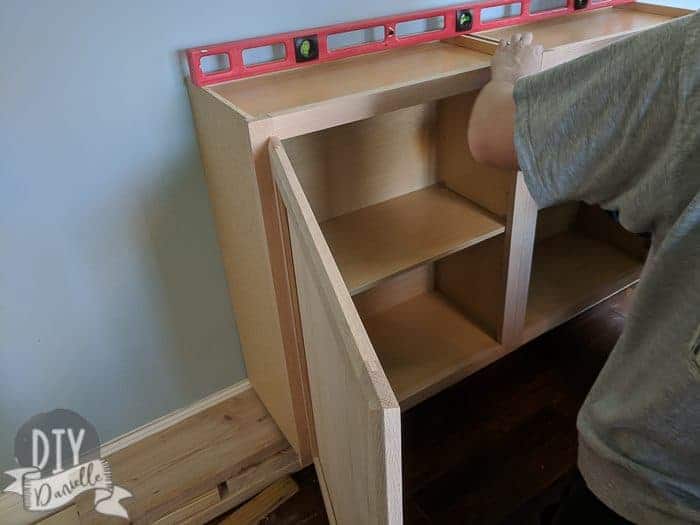
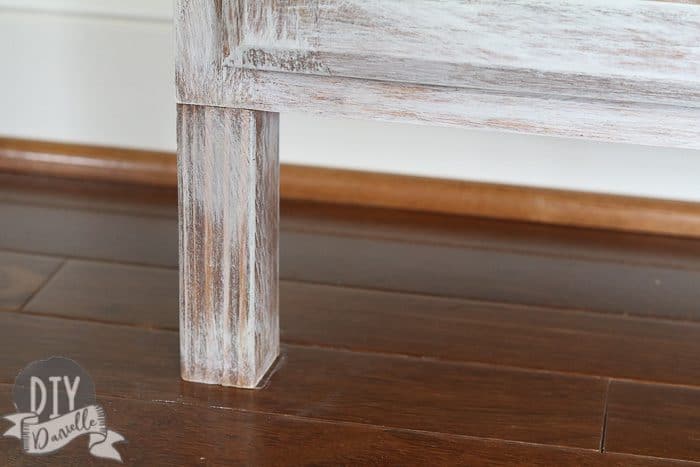
I added the feet for additional support, seeing we’ll likely have little boys hanging on these at some point.
Keep in mind that you need the end pieces for the cabinets on either end, assuming the end isn’t against a wall and hidden. They make these panels that you can just pop on and attach with glue. Otherwise it will be raw wood showing and it’s not pretty.
Countertop
Nothing crazy going on here. I just found some wood that I liked for the top and we combined them, stained, and added several layers of poly to protect it.
These are combined with a Kreg Jig to make pocket holes… these are pretty useful if you don’t have one yet.
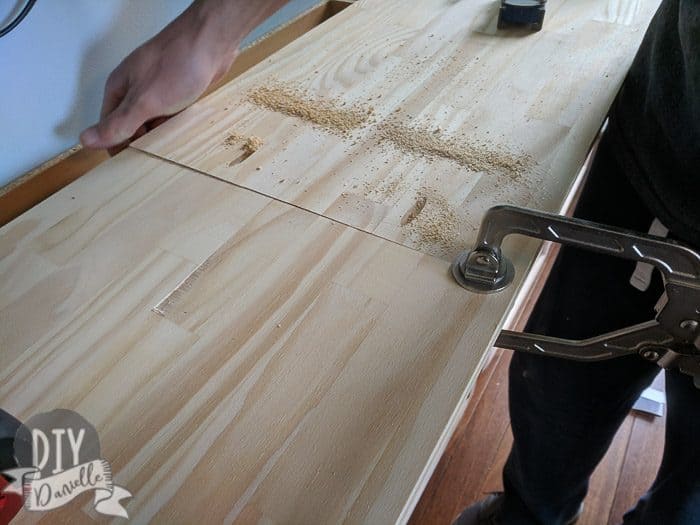
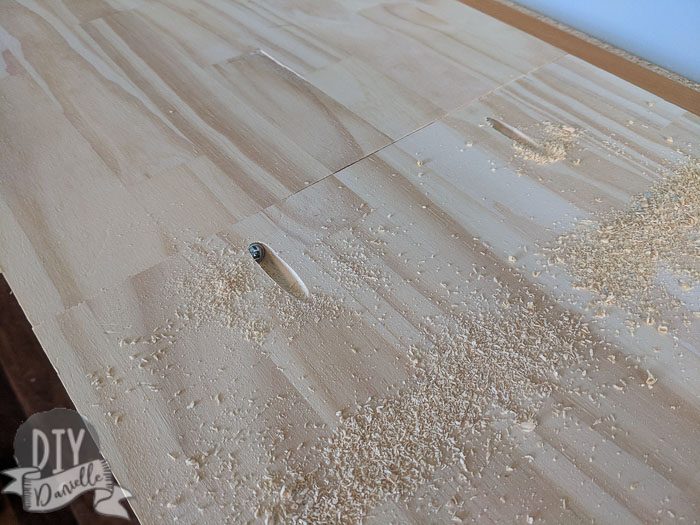
There’s also a hole in the top for the wiring.
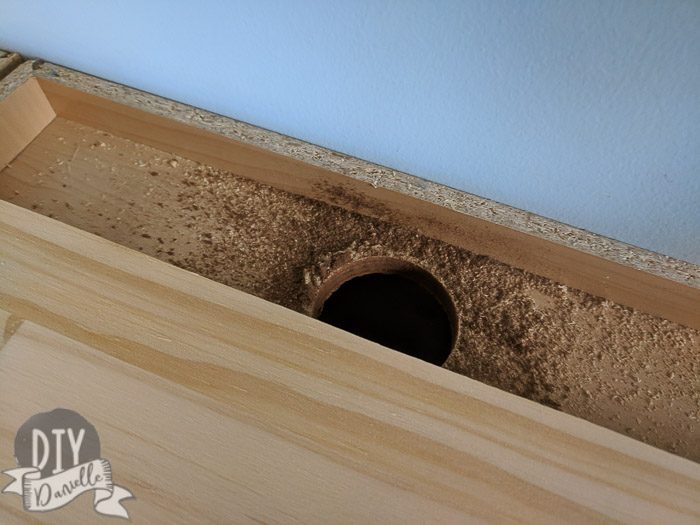
Alternatively you could hide your wiring, but my husband never seems to want to do this. I should either ask him why or just hide the wiring myself because now that I know how it’s done, it drives me a bit crazy that we haven’t done it.
You can use a heavy duty glue to attach the countertop to the cabinets. I did this AFTER I painted which allowed me to move the countertop away from the wall while I was staining and applying poly. No taping the wall.

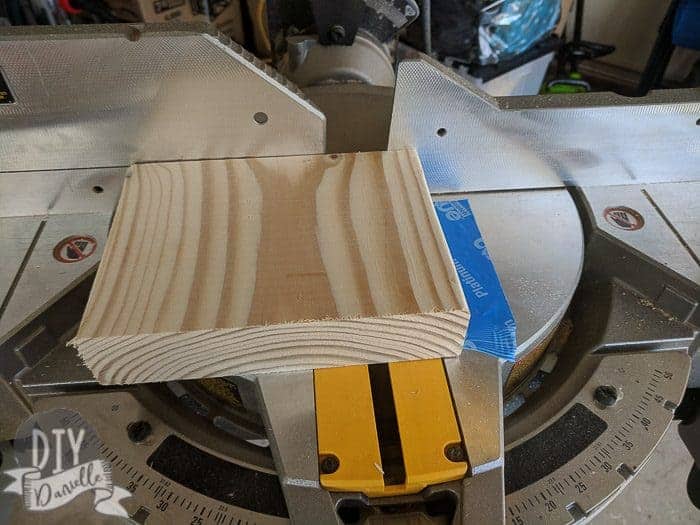
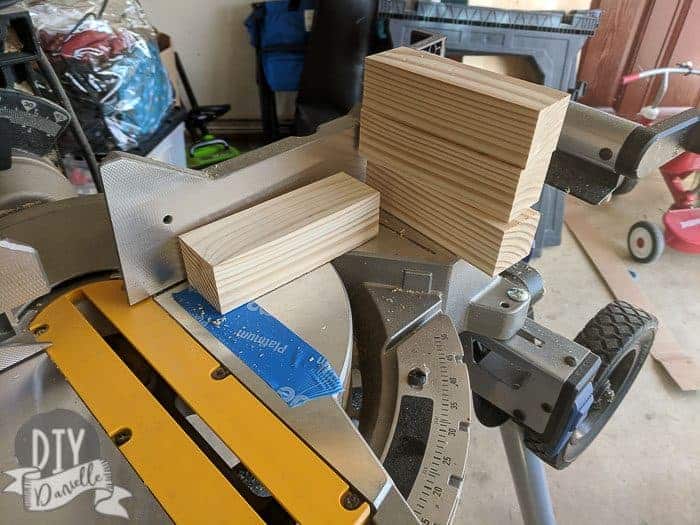
Legs for the Cabinets
This was something my husband was trying to puzzle out for a while and I finally went out to the garage, grabbed some scrap wood, cut them, and squeezed them under the cabinets like legs. I LIKE THEM! My husband was even impressed.
I haven’t quite puzzled out how I want to attach them… they’re stuck pretty tight but can still move with enough force. We have three boys so AT SOME POINT there WILL be enough force. I have some little brackets that might work or I could do glue. I don’t know.
The best part of this is that I can easily sweep under there or the Roomba can get under there.
Distressing the Cabinets
I wanted to talk a little about how I painted this compared to the last time where I painted, stained then distressed by sanding, then added poly.
My stain was Minwax Red Mahogany. I used plain white paint.
Instead of that method of distressing, I decided to dry brush the paint on. This meant I applied a stain, let it dry, then I dry brushed white paint on. After that was dry, I applied several coats of polyurethane to seal it.
I like it. I did, however, find that dry brushing is a lot more time consuming with cabinets due to the nooks and crannies on the doors.
You can check out my post about how to stain cabinets more quickly if you want some easy tips.
My only complaint is that the cherry-ish floors and the stain colors I choose with the white over it seem to lend more of a pinkish tone to the cabinets. They match, but it feels a bit less gender neutral than I’d like in my furniture. I haven’t quite puzzled out if I might be able to tone that down with other color choices in the room- suggestions welcome!
I’m super happy we finished this and have a place to hide toys now. It’s one of the ONLY rooms in the house that really feels under control in terms of organization and it’s because we have the storage. It’s such a nice feeling and I can’t wait to see what it looks like with shelves and under cabinet lighting too!


Need a place to put the remote? Check out this sofa table build with recessed outlet!
Please pin this!
Easy Living Room Storage Cabinets
Make these easy DIY storage cabinets to organize toys, movies, and more. The doors keep things out of sight so it doesn't look cluttered.
Materials
- Cabinets
- Side pieces for the two end cabinets
- Scrap wood for the feet
- Wood for countertop
- Stain / Paint / Polyurethane
- TV Wall Mount
Tools
- Stud finder
- Level
- Screws
- Kreg Pocket Hole System
Instructions
- Follow the instructions for hanging a top cabinet, but hang the cabinet closer to the floor.
- Use a level to ensure cabinets are even.
- Add feet for additional support.
- Prepare the wood for the counter top by staining and adding several coats of poly.
- We used a Kreg Jig to make pocket holes. Pocket holes allow you to combine the two pieces into one long counter top.
- Once combined flip it so the pocket holes and screws are hidden.
- Add a hole for the wiring.
- Use a heavy duty glue to attach the counter top to the cabinets.
Recommended Products
As an Amazon Associate and member of other affiliate programs, I earn from qualifying purchases.


Toni | Girl, Just DIY!
Wednesday 1st of May 2019
These cabinets turned out great, I love that you are using upper cabinets as a narrower lower cabinet! The little feet you made for them are perfect.
Carmen
Monday 29th of April 2019
these are so gorgeous!! I love them!
Danielle
Sunday 5th of May 2019
Thanks! I just put up a growth chart that matches the finish and it's LOVE. :)
Danielle
Tuesday 30th of April 2019
Thank you!
Christine Cook
Wednesday 17th of April 2019
Goodness is that cabinet ever beautiful!!! I want it!!! So practical too! Great job!
Danielle
Wednesday 24th of April 2019
Thank you!
Meegan
Tuesday 16th of April 2019
You would never guess that this a DIY project, Danielle! I think it looks amazing and professional. You both did an amazing job.
Danielle
Wednesday 24th of April 2019
Thank you!