
How to build a simple electric toothbrush holder for your bathroom. This easy bathroom shelf will help keep clutter off your counter!
This post contains affiliate links. If you make a purchase using these links, I may receive a commission from the sale. This does not impact your price for the product(s). Thank you.
This year I’ve decided to join a group of bloggers doing a year of monthly DIY challenges. Each month, we have a new challenge. I like that it requires me to stop just flying by the seat of my pants in terms of projects and stick with a monthly theme- it means thinking outside of the box a little. This month really was a struggle because I’m doing sooooo many goat projects right now, getting way too little sleep, and I had TOO many ideas for this particular topic which was “Build to Organize.” I need to do so many organization projects, but most are simply too big for me to take on right now. I’ve been working on smaller scale woodworking projects to grow my skills woodworking. The perfect project ended up being a simple toothbrush holder.
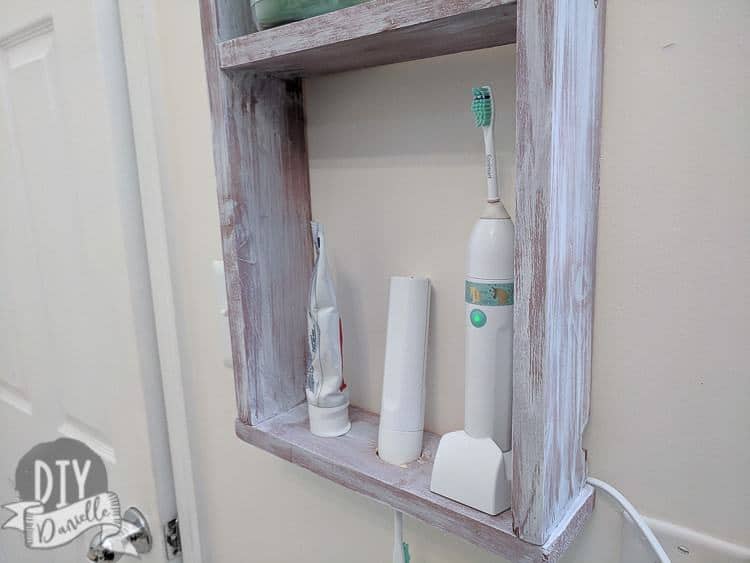
Why a toothbrush shelf? The baby keeps grabbing our toothbrushes off the counter to “brush his teeth” so I wanted to keep the toothbrushes- and the charger- up a bit higher and out of his reach. Because it’s only a matter of time before he decides to clean the toilet with it. It makes me a giggle a bit, but we don’t want to be replacing expensive electric toothbrushes either.
The shelf is easy to build, attractive and extremely functional. Not only will it get our toothbrushes off the counter, it will also get some other items up off it too. And in terms of simplicity, it’s a fairly easy build that still uses a couple of tools that you might otherwise not be familiar with.
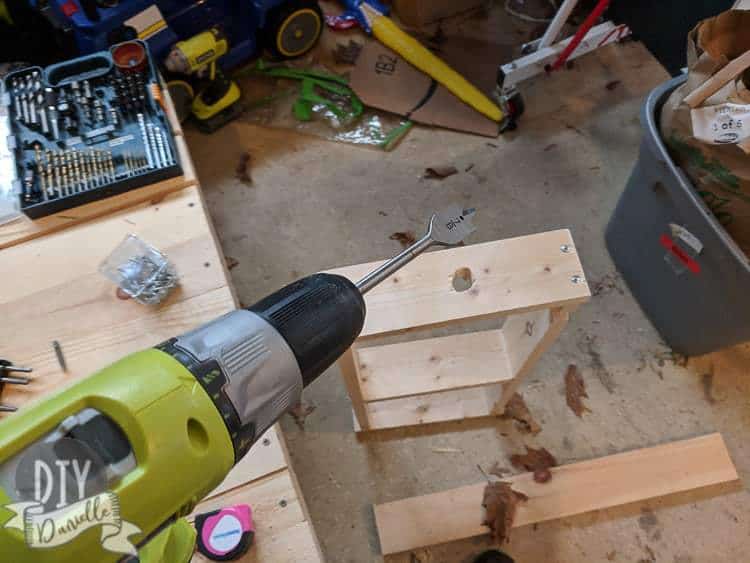
The spade bit is a pretty neat bit to put on your drill. It creates a hole the size of the bit and it’s super easy to use. Just make sure your leg isn’t under the wood you’re cutting because it wouldn’t be fun to explain to the ER doc how you created a perfect 1 3/8″ hole in your leg (wink). As always, please be careful completing these projects and use common sense- make sure nothing important (like your body parts) is in the way of your drill, drill bits, or saw.
I’m weirdly obsessed with projects for my toothbrushes so make sure to check out Tips for Preventing Toothbrush Mold | How to Clean an Electric Toothbrush | How to Make a Toothbrush Scarf | How to Make a Toothbrush Cover if you like weird creative toothbrush solutions.
SUPPLIES FOR THIS PROJECT
- Wood: 1x4s
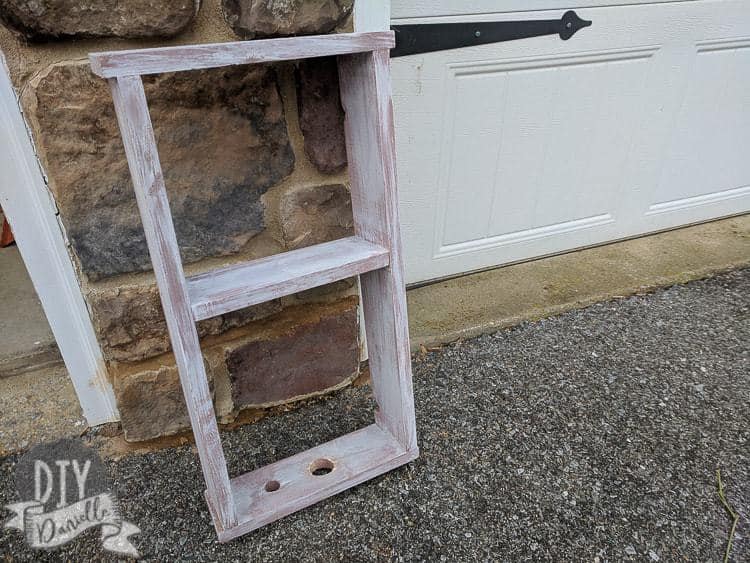
- Paint/Stain of your choice: I used white paint dry brushed over Satin Blush Rustoleum Painter’s Touch 2x Spray Paint and Primer. Probably should have primed this first if I’d been going for a solid paint color, but it worked for the dry brushing without a true primer
- 3M Picture Hanging Command Strips (the size appropriate for your wood) or Heavy Duty Single Hole D Ring / Triangle Strap Hanger w/ Screws

- Screws: 1.5″
- Screwdriver- electric drill or just a hand held one.
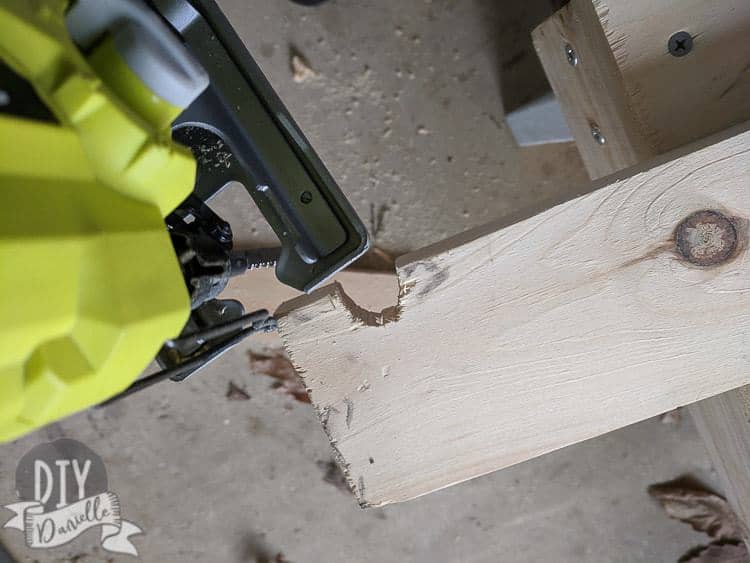
- Saw of some sort. Love my miter saw best, but I actually just used my regular Ryobi circular saw for this project.
- Jig saw or a drill/spade bit that creates a small hole. Tried the jig saw, bit touch and go there. It’s hard to do a small cut with it in my opinion.
- 1 3/8 and 7/8 spade bits: This set looks good if you don’t have any yet. I thought the hole size with the 1 3/8 bit was perfect for my toothbrush.
Electric Toothbrush Storage Shelf
Cutting Everything for the Shelf
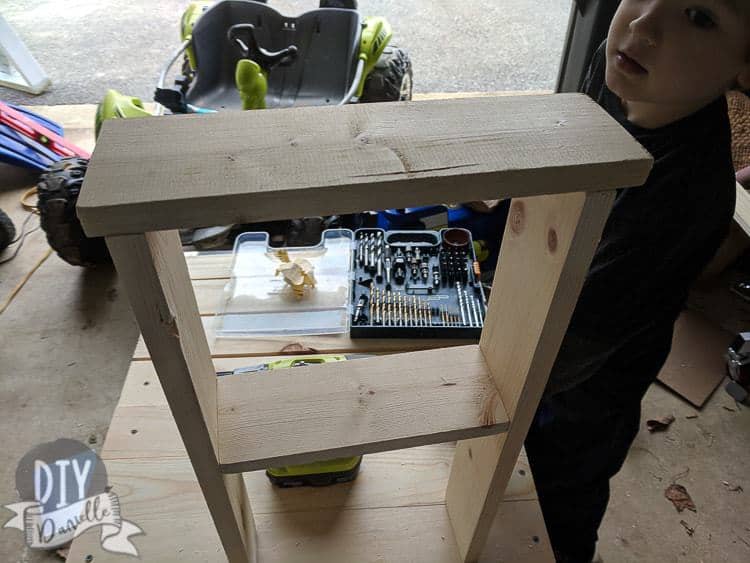
Start by cutting your wood. I cut my 1x4s into the following lengths:
- (2) 12″ 1x4s
- (2) 22″ 1x4s
- (1) 9 3/4″ 1x4s
Congratulations… you’re now finished with most of the shelf. Haha. This is really simple y’all.
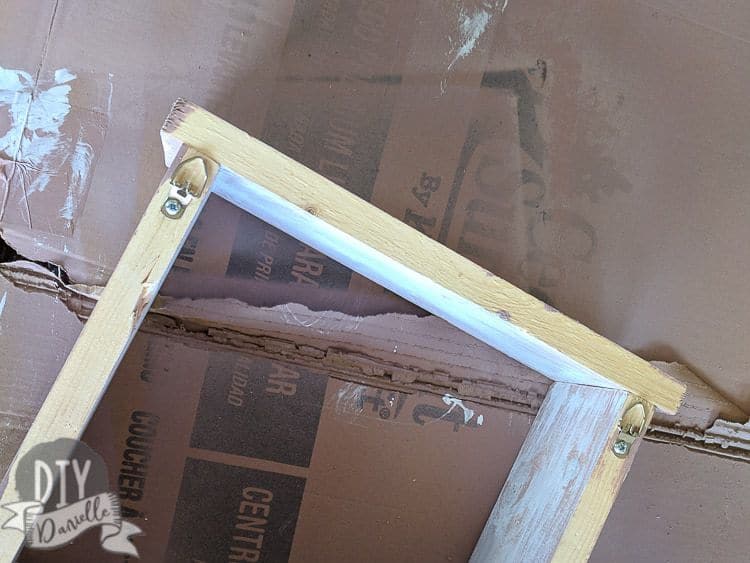
Take one of the 12″ pieces and drill a hole with your 7/8″ spade bit, assuming your toothbrush is 1″ diameter in the thickest part of it. You’ll need to adjust the size depending on your brush. I drilled a second hole with my 1 3/8 spade bit. Once I tried it out, I ended up liking the fit of my toothbrush in the 1 3/8 hole better than the 7/8 hole, but it fit in both. You can always start with the 7/8 then make it bigger if you prefer.
I found my spade bits AFTER I put this together and tried doing it the hard way (with the jig saw). I recommend drilling the holes before putting it together.
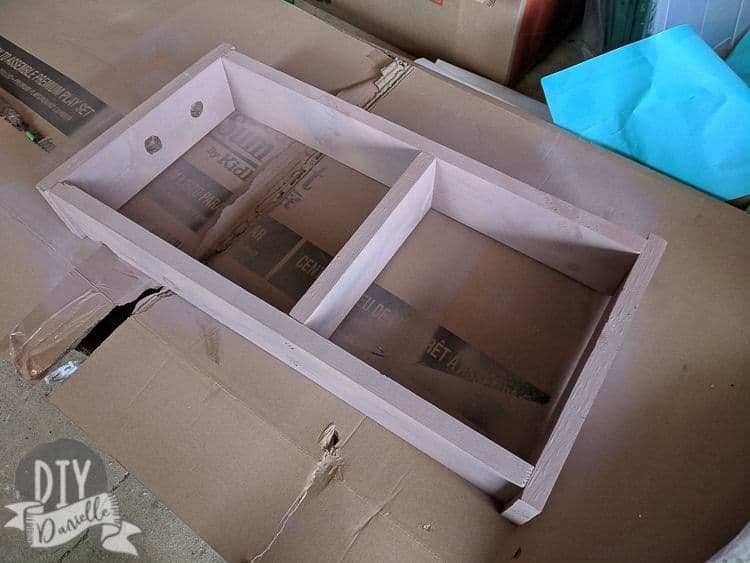
You’ll also want to take one of your 22″ pieces and add a small half circle at the bottom back side. This will be for your cord to go through. I opted for a half circle vs. a circle in the middle so I didn’t need an enormous hole that the plug would fit through. For mine, I used a jig saw to make the half circle…
Sand all of the holes.
Building the Shelf
For the next section you can either paint your wood separately or paint when it’s together- your choice. I put it together first. Dry brushing would probably have been easier if I had done the painting first.
I lined up my (2) 22″ pieces with the “cord hole” facing what would be the back and bottom of my shelf. Then I measured 12″ up from the bottom because this was the height I needed to fit my base and toothbrush on top. You need enough room to put your toothbrush on it.
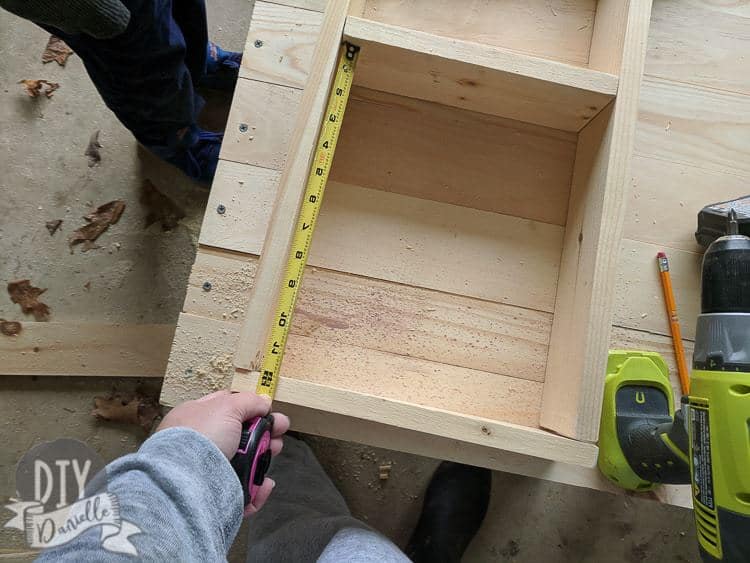
The 12″ mark is where you 9.75″ piece of wood will go- aka the middle shelf. I put this on first, making sure to make 12″ equally on each side. I used two 1.5″ screws for each side to screw them into the 22″ sides.
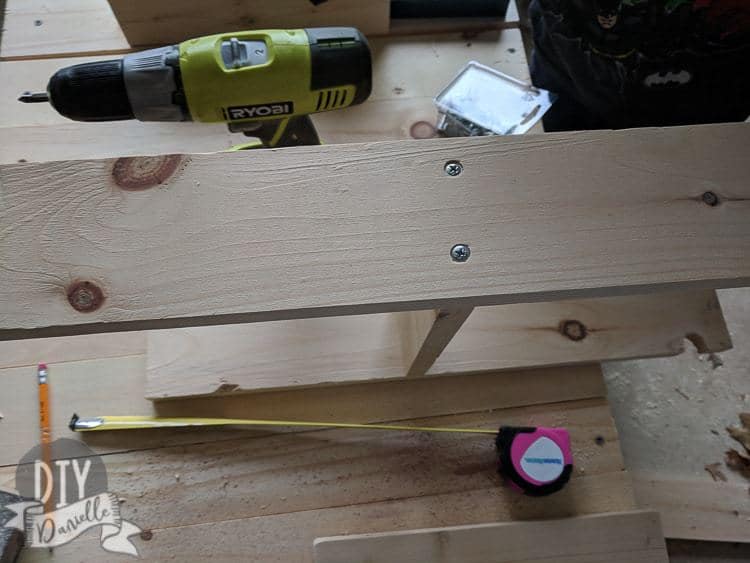
Once that’s secure, you can put your top 12″ piece on. Again- 2, 1.5″ screws for each side. The 12″ piece goes on TOP of the 22″ pieces. There will be slight overlap so make sure there’s an equal amount on each side.
Now do the same for the bottom. Make sure the side by your cord hole has enough room for the base.
Painting the Shelf
All that’s left is to paint the piece and add your hooks for the back. I spray painted this a vintage blush Rustoleum Painter’s Touch 2x Spray Paint and let it dry. Then I dry brushed on some white paint that was leftover from building our goat house (post coming soon!). Love how it looks!

I used these Heavy Duty Single Hole D Ring / Triangle Strap Hanger w/ Screws that screw onto the back, then used my “Earthquake proof” (aka kid proof) hooks (I have a big variety pack of these but this set should work) to hang them on the wall. Make sure the toothbrush shelf is level, of course.
And you’re done. This isn’t a time consuming project and it’s great for unused wall space in your bathroom. I am always happy to have things off the countertops in the bathroom because it makes wiping down countertops a bit easier and more convenient.
Enjoy your toothbrush holder! I hope you take a few to share your finished product in our Facebook Group, Stuff Mama Makes.
A video tutorial for those who prefer that format…
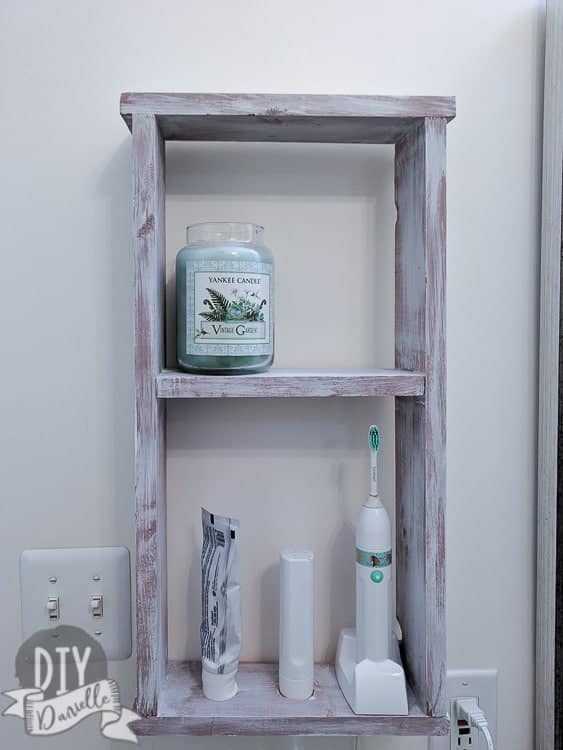
Here’s a picture of it hanging up (I don’t plan to burn the candle there… purely for aesthetics for this photo).
Please pin this- it’s IMMENSELY helpful to growing my blog!
Google Web Story: DIY Electric Toothbrush Holder
Looking for more organization ideas for the bathroom? Visit: Organizing a Child’s Bathroom | How to Keep Hand Towels from Falling Off | DIY Over the Door Shelf for the Bathroom | Adding Shelves for Storage in a Small Bath | Under Sink Organizer
This link party is powered by Link Party Animal

1905 Farmhouse, Abbots at Home, Bitterroot DIY, By Brittany Goldwyn, Creative Ramblings, Cribbs Style, Delicious & DIY, DIY Beautify, DIY Danielle, Dukes and Duchesses, Girl, Just DIY, Happily Ever After, Etc, Health, Home & Heart, House by the Bay Design, House on Longwood Lane, Just Measuring Up, Kenya Rae, Little Bits of Home, Living Letter Home, My Kitchen My Craft, Pinspired to DIY, Red Cottage Chronicles, Refashionably Late, Renovating Mapleson Manor, Savvy Apron, Shine Your Light, Shrimp Salad Circus, Songbird Blog, Southern Revivals, T.Moore Home, The DIY Dreamer, The DIY Village, The Frugal Homemaker, The Handyman’s Daughter, Two Feet First, What Meegan Makes, Zucchini Sisters
Mariah
Sunday 21st of July 2019
I often have the problem with my toothbrush that it falls down every time I try to put it down while in a rush. With this innovative design, now I do not have to worry about that anymore. Thanks a lot for this amazing idea.
Christine
Thursday 28th of February 2019
What a great idea! I love the distressed look you achieved with it too.
Lisa
Tuesday 26th of February 2019
This is such a clever and useful idea, especially with your tooth brushing babe around! :). It looks so pretty too, love the finish.
Amy
Wednesday 20th of February 2019
Such a great idea!
Danielle
Wednesday 20th of February 2019
Thank you!