

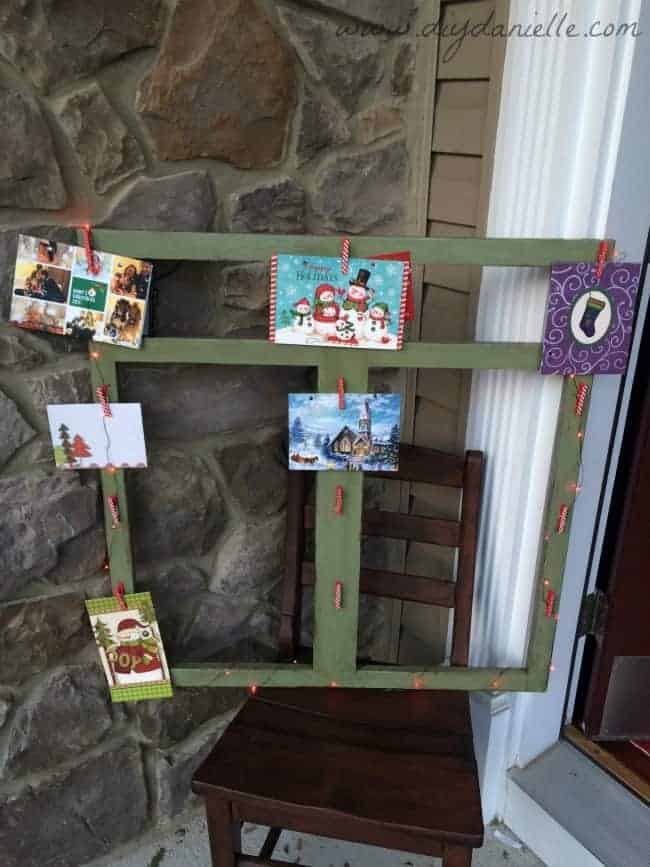
I upcycled the front of an old cabinet into a fantastic holiday card display. It was such a fun repurpose and I’m saving the doors and hardware for yet another project. This year we will have all of our Christmas cards neatly in one place!
I’ve been making big plans for upcycling the front of this cabinet and I was excited to finally find the perfect use for it. I needed somewhere to display Christmas cards and this made PERFECT sense. It was just the right size to hold quite a few cards and its frame like appearance worked well.
I should mention where the REST of the cabinet is… we made an arcade machine with it. It’s a cool post so you should definitely check it out. I removed the cabinet doors and hardware as well. Those will be upcycled when I get around to it… I’ve got to narrow down my list of ideas for those. In the meantime, here’s a quick tutorial on how to make your own card display.
Supplies
Supplies listed below may include affiliate links to the products.
- Cabinet front to upcycle
- Paint and distressing supplies
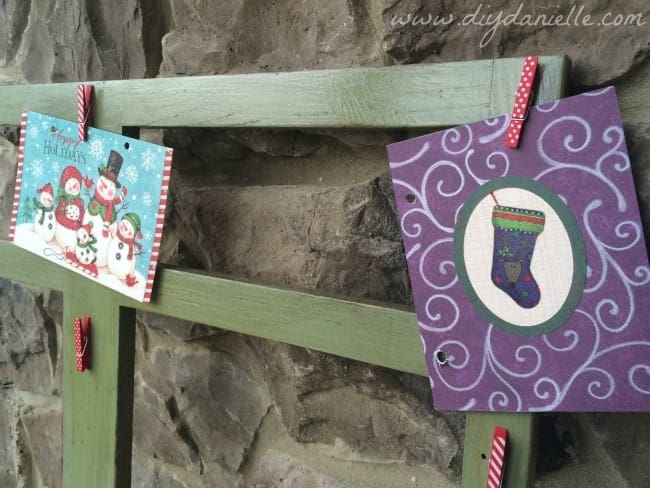
- Holiday clothespins
- LED lights
- Holiday cards
- Heavy Duty Single Hole D Ring / Triangle Strap Hanger w/ Screws
- 15g Gorilla Super Glue Gel
Tutorial
This project was pretty basic. I took the front of the cabinet and removed all of the hardware from it and the doors. I put those to the side.
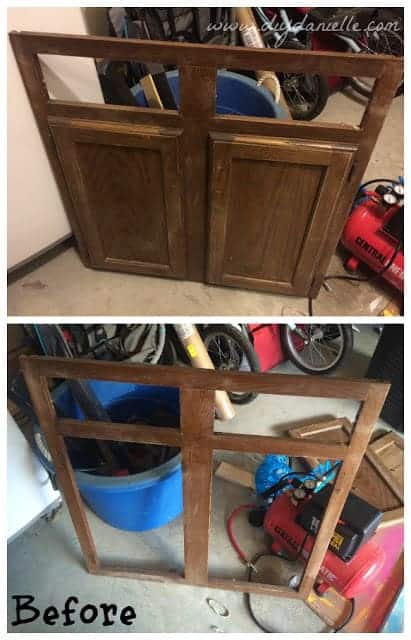
Then I painted and distressed the front of the display. I went with green with a darker stain. This is a tutorial on how I distress my furniture: Drab to Dreamy Lego Desk- Easy Distressing for Wood Furniture. I didn’t fill in the holes from my hardware… I felt the distressed look worked well enough to make it less obvious. But if I’d painted this normally or just stained it, I would’ve wanted to fill those in.

Once dry and poly was applied, I added hooks to the back. Nothing fancy here.
I flipped it around to the front and used gorilla glue to attach the clips. I made sure to space them out so that the cards wouldn’t overlap.
Once I completed that, I used some LED lights to wrap around the display. This is completely optional, but I thought it was a fun addition. I used the clips to hold the wire for the LED lights. Unfortunately, these weren’t quite long enough to go around the whole frame so you may want to pick a bigger set if that’s your goal. The battery pack for the lights is tucked behind one of the cards.
Thanks for taking the time to read this post! I really appreciate the time you’ve taken. Please share, like, and pin my post if you enjoyed it. Follow me on social media and subscribe to my email list to keep up to date on all of my latest projects!
Hilda Rodgers
Friday 11th of December 2015
What a great idea! It really looks like a frame that was made for holiday cards! I love how you think of these creative ideas :)
Bekah Walsh
Thursday 10th of December 2015
I just adore that green finish!