

Tips for painting plastic so it won’t fade or chip. Is painting plastic worth the effort? Will it last, fade, or chip off? What are the best ways to paint plastic? How can the life of painted plastic be extended?
This post may contain affiliate links which may earn me commissions should you click through them and take certain actions. As an affiliate for Amazon, Cricut, xTool, Home Depot, and other sites, I earn from qualifying purchases. Please DIY carefully. View my full legal disclosures here.
Please read the whole post so you don’t miss any important information!
Back in 2015, I posted about painting an old Little Tikes plastic playhouse that we found next to the dumpster at our gym. Since then, I’ve experimented with painting other plastic items and I wanted to check in with how the paint has held up over time. I’m also going to discuss the types of plastic paint available and techniques that work or don’t work.
Scroll down a bit if you just want to see all of the reverse before and after photos for these items I painted… haha. It’s so much fun to see how things stand up over time!
Information about Plastic Paint
First, let’s talk plastic paint.
Brands of Plastic Paint
There’s two major brands that make paint for plastic- Krylon and Rustoleum. The ones I’ve seen have generally been available as spray paint. Each brand has a couple of different spray paints that work with plastic. I’ve tried some, but not all.
I’m pretty brand loyal to Rustoleum, specifically the 2x spray paint that has primer included, at this point. I have not had good luck with other brands and quite frankly, I’m too lazy to want to be redoing old projects. Not a fan of redoing stuff. It’s not perfect, however. I still had some wear and tear on my playhouse. I don’t use their regular plastic paint either… just the 2x. If you’ve had luck with Krylon, feel free to leave me a comment and tell me about your project. I tried it on a couple of items, didn’t like the coverage and longevity of the paint job, and haven’t tried it again.
In regard to that, I would recommend starting the project by priming the playhouse first. While the 2x has primer in it, the additional primer may help make this paint job last longer. I haven’t tested this theory yet though. Rustoleum sells this paint primer for plastic though which would be worth a try.
I’m still not sure if the UV spray did much, but it didn’t hurt… so there’s that. I didn’t see a lot of sun fading. It seems like a good idea to try.
Storing Your Plastic Paint
Ugh so THIS I can speak to from experience… store your plastic paint carefully in a temperature controlled-ish area (like your basement). I was storing my spray paint (and regular paint) in our garage at our old house and the extremes of heat and cold really didn’t do my spray paint any favors. We don’t have huge temperature extremes here in Maryland, but it was enough that many of my spray paint containers were unusable. Womp womp.
I would actually recommend only buying what you need for a project and NOT storing it at all. But we all know that’s a fantasy for many of us crafters.
Color Choice for Plastic Paint: And How Color Choice Affects Longevity
When I was discussing this post with my husband, we were checking out the old Little Tikes plastic slide that our in-laws saved to pass down. It’s probably 25 years old or so. The original colors were red, beige, and green. The beige, naturally, hasn’t truly faded. The green is slightly faded, but the red is badly faded.
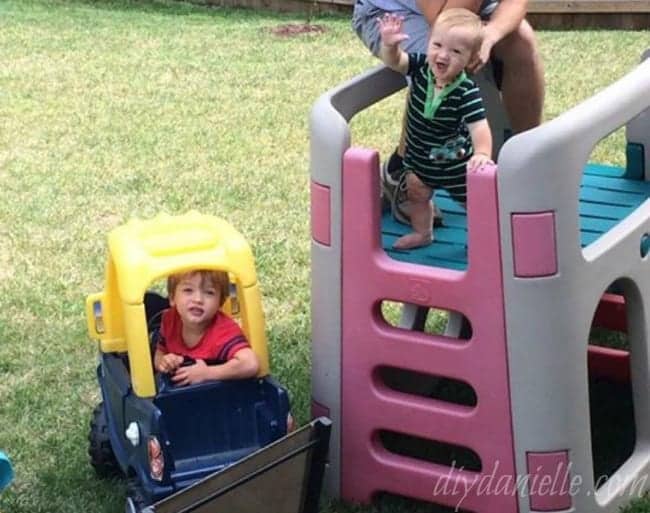
Comparatively, we have a blue and yellow Little Tikes car on the left in this picture. The blue is still going strong after a couple years, but the yellow top is quite faded. It’s a pretty huge difference. Looking at the bottom of the car, you’d think it was new (besides the peeling stickers). The top makes it look much older than it is.
The photo above is from a few years ago so it isn’t a good representation of the blue and yellow car.
We also have an orange chair which is really faded despite only being a year old.
This is all in regard to the original manufacturer colors which, given how they’re applied, should be more durable than a regular spray paint. The reason is that the colors were likely mixed into the plastic before it hardened, rather than being applied after. My husband mentioned that you can tell which color was the original color on many of our indoor toys too… you’ll notice that there’s one color that just doesn’t faded, but the other colors rub off after use (I’m thinking of those baby toys that get a lot of wear and tear). Now that we’ve discussed this, I notice faded paint everywhere, haha.
This discussion had me curious about if the color affects how quickly a paint fades so I looked it up. It does. Reds tend to fade faster and blues don’t fade as fast. This makes sense when you look at the colors that I painted the playhouse. The dark blue has held up much better than the other colors. I found this reference.com article about which colors fade the fastest and my understanding is that shorter wavelength lights (blues, violet) are slower to fade than longer wavelength lights.
Colors range from shortest to longest wavelength in the following order: violet, blue, green, yellow, orange, and red.
Of course, we need to consider that paint colors are made by mixing different colors together so, for example, my light blue paint faded faster than the dark blue likely because it’s not a pure blue (and also because it’s on the roof and gets the most direct sunlight). Or at least that’s my theory… after all, to achieve the light blue, a lighter color would have been added to the primary blue by the paint manufacturer.
I needed to buy some new seat cushions for our porch chairs and I was almost about to grab some red ones when I thought of this post… and erred on side of caution and went for the blue pattern.
Storing and Caring for Products After Painting
I wouldn’t store these items on top of each other, like I did the buckets. If they’re stored in a way that scrapes the paint, it will scrape off.
Sunlight, snow, and the like will cause wear and tear to the paint job so storing the items in a shed or garage may extend their life. Or you can cover them with a tarp for winter.
Some toys may be used indoors which would substantially reduce the wear and tear they get (ie. the playhouse could be an indoor toy if you have room for it).
Paint Technique for Plastic Paint
Technique might be the wrong word here. I’m not sure what else to call it. As stated above, I recommend trying a primer underneath. I doubt it will hurt.
Make sure to let each layer dry fully. It’d be ideal to do the painting in more temperate weather, rather than August when it’s beastly hot. I’m sure that doesn’t help the paint stay on. Temperature extremes aren’t good for paint jobs. I’d say between 50-80 degrees Fahrenheit is the ideal temperature range for painting.
I’m going to speak to the playhouse in particular… I loved all of the added detail to my playhouse that I added with the acrylic paints. It didn’t stand up very well over time. I’m not sure I would do it again for an outdoor playhouse, but it might work indoors.
My main complaint is that the playhouse would be much easier to reapply paint every year or two if the detailing wasn’t on it. I may redo the paint job on this, at which point I’ll cover up all of the acrylic work that I did. It’s a shame because it took me hours to do all of those details.
Embellishing Painted Items
I added stickers to my playhouse and they mostly worked well. Now that I own a Cricut (learn about the Cricut Maker or the Cricut Air 2), I’d likely do my stickers with 651/Permanent/Outdoor vinyl though. I think it would stay on better than the stickers I used and be easier to design and apply. You can also often purchase the original stickers from the manufacturer if you check on their replacement parts website. I was also able to replace other parts for our playhouse by checking their site.
Projects Made with Plastic Paint
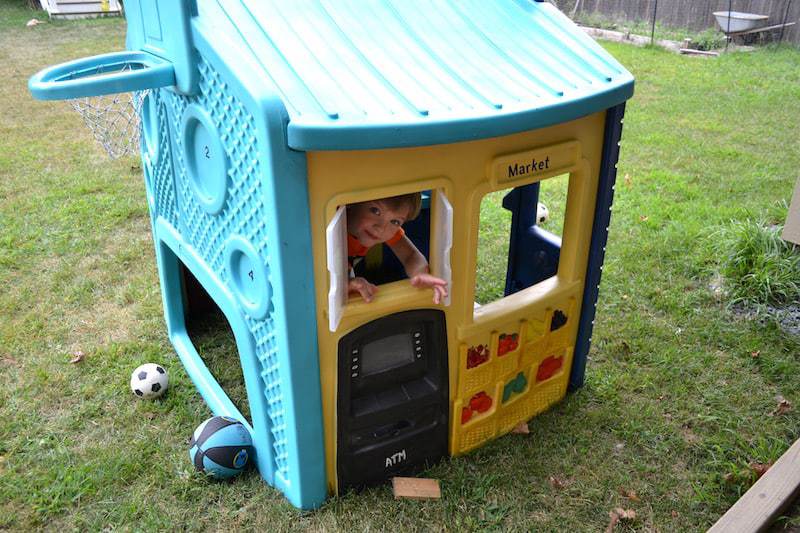
The Little Tikes Playhouse Paint Job: 1.5 Years Later
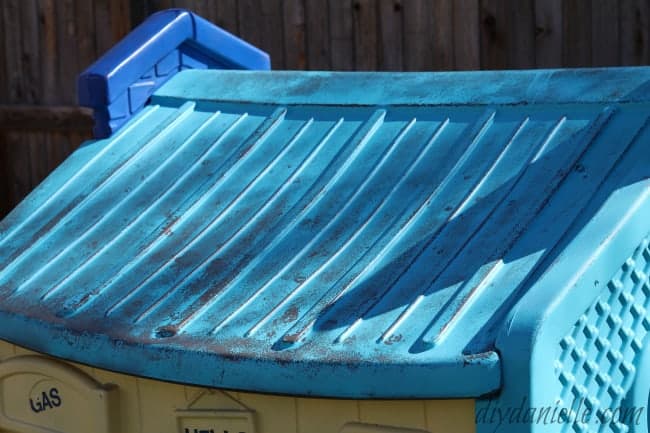
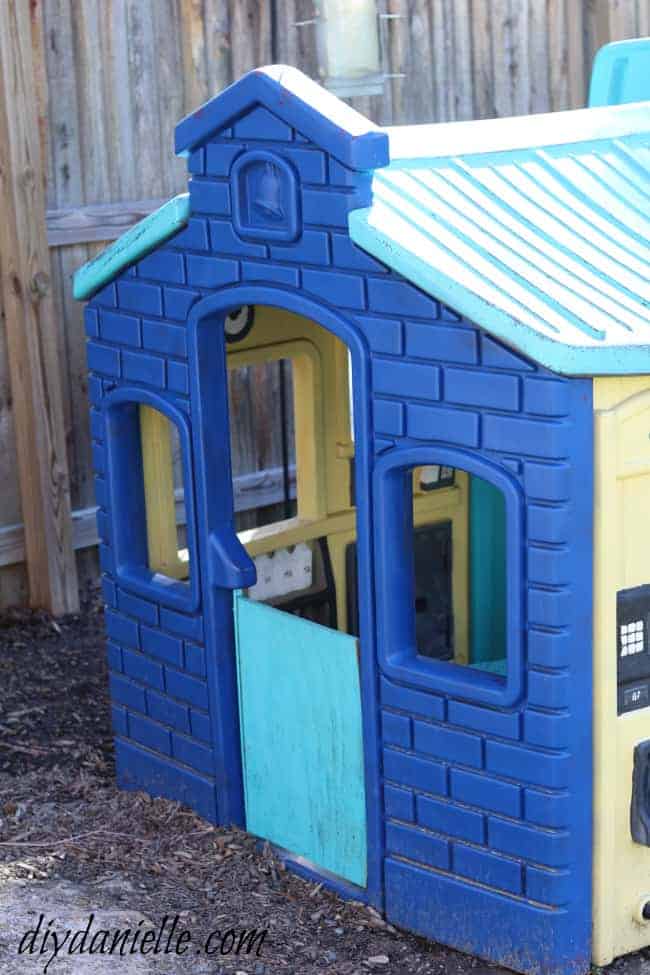
Just to explain the type of wear and tear that this playhouse had over the 1.5 years, it’s been kept outside through snow, rain, hail, and sunshine. My kids love to climb onto the roof to sit on it. The plastic window cracked at some point so I did order a replacement window. Overall, I think the sides (inside and out) have held up pretty well. The roof could use an extra coat of paint or two because it’s had some peeling and fading. The acrylic didn’t stand up well on the outside.This is the “Before” Picture:
These are some pictures from the painted plastic playhouse almost two years later. As you can see, the roof took the brunt of the wear. The acrylic had a lot of wear too (I’ll show you that toward the end of the post).
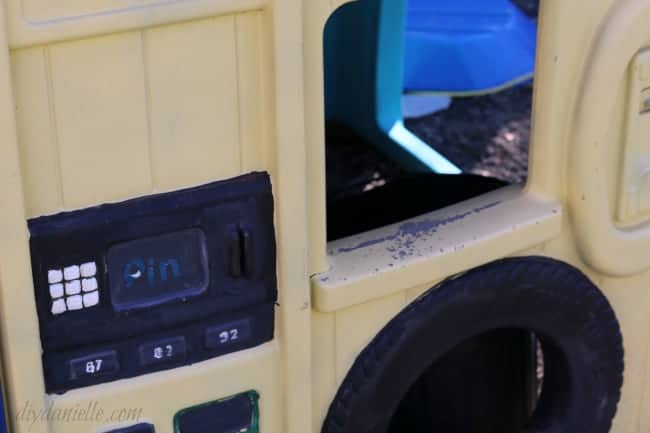
Seam areas were more apt to scrape off… having some serious regrets about the ugly acrylic job I did on the tire and ATM machine.
This side looks pretty good. I just had some issues with the edges of the hoop.
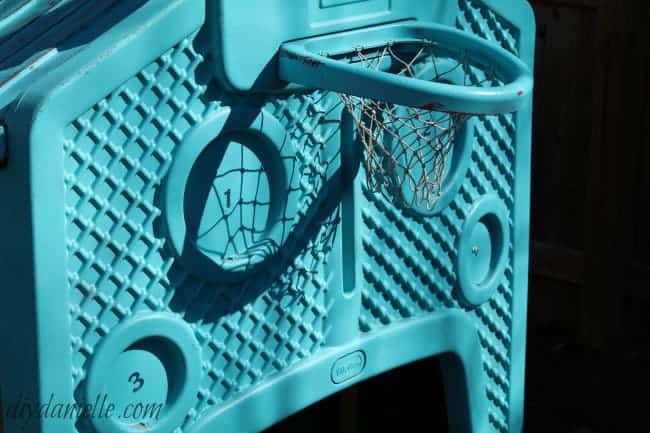
The dark blue looks, by far, the best. We’ll talk more about that in a moment. But I think I may have put more layers on that side too because it was so hard to cover the red.
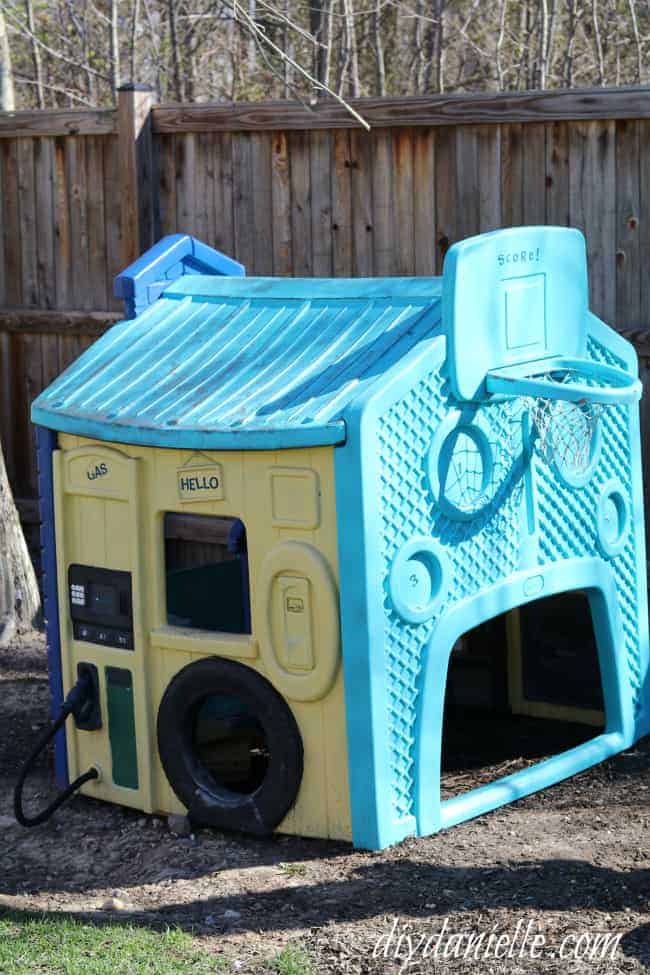
Here’s the “big picture” though… as you can tell, it still looks decent from afar, considering it’s had almost two years of weathering and children.
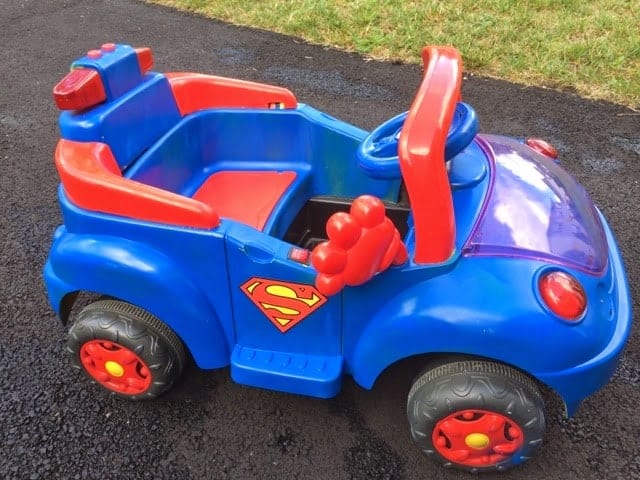
The Superman Car
I painted this old ride on car as a “Superman” car. We got the car off Freecycle and have since passed it on to others (it didn’t have enough power to run in our grass and our driveway is too short to appreciate it) so I don’t have any pictures of it once it had been used for a while.I believe this was my first attempt to paint plastic. I used Krylon plastic paint. The finished car was kept in the garage when not in use. It definitely had a lot of peeling and chipped paint, although it was still looking good enough last year that I’m sure some little boy or girl enjoyed it very much.
This is just the before picture though… no after available unfortunately.
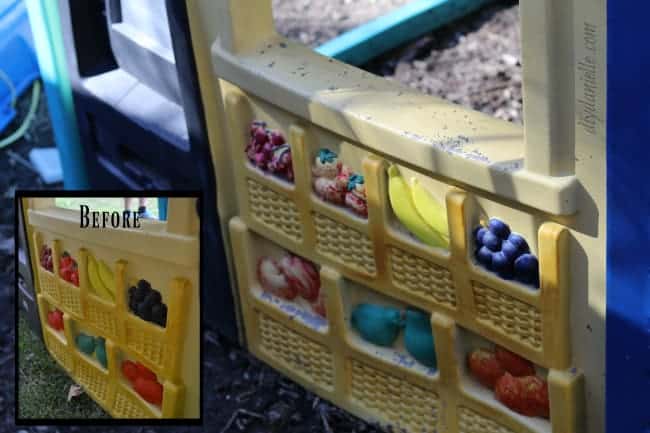
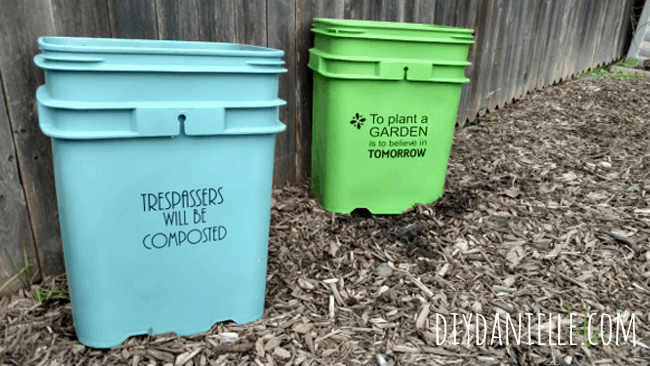
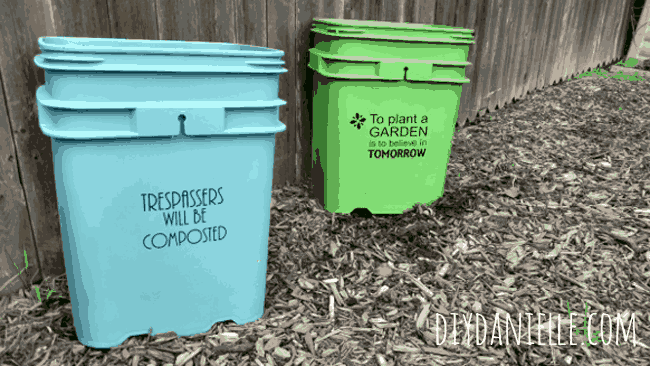
Planters from Cat Litter Containers
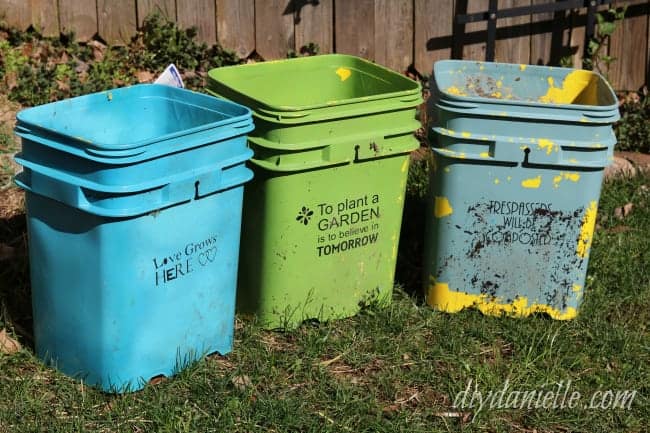
Last June, I found some free cat litter containers off Freecycle and went crazy painting them, then adding vinyl with cute quotes to make planters. These came out so cute. I used a lot of Krylon plastic paint that I had sitting around, but I believe one or two were painted with Rustoleum 2x. As such, I can’t say that the peeling is 100% due to the paint, but the storage method was a bigger issue. Over the winter, I stacked them and I believe that caused paint to chip off. The 651 still looks great though.
This is the pictures with the fresh paint…
These are the “After” photos… less than a year later. I think the darker blue needed an additional layer of paint before I used it, but it seemed to have stood up to time better than the others. I believe this used the Rustoleum 2x rather than the Krylon plastic paint that I used for the two on the right.
I also think painting the inside of this was probably overkill.
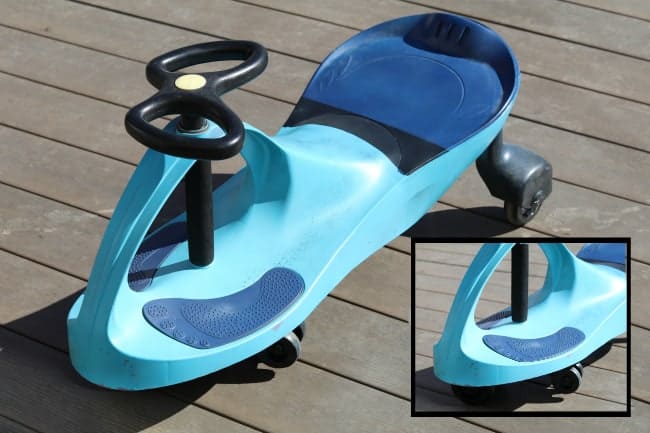
Ride On Toy: Plasma Car
Also in June, I painted this Plasma Car that was starting to fade. It was kept inside when not in use, but did get some wear and tear on the front where the kids slam it into everything.This is the original paint job…
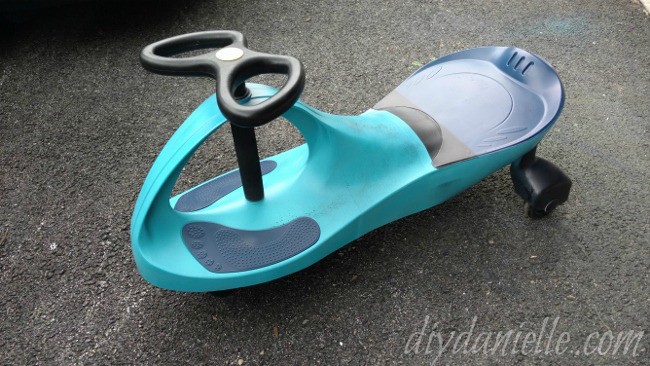
This is the after picture… as you can see, not a big difference in how it looks. Woohoo! I used the same Rustoleum spray paint that I used on the playhouse.
Final Recommendations for Paint Type, Technique, Color Choice, and Storage
I have some thoughts about what worked best and what didn’t. Hopefully these recommendations will help y’all decide if painting is the right choice for you, and help you decide on the right type of paint, technique, and storage.
Overall, I recommend painting plastic if the item will otherwise end up in a landfill- or passing them on to someone else. I’m a big fan of reusing old items until they are absolutely dead before tossing them. While the paint has, in these cases, had some wear and tear, I can’t say that they had worse wear and tear than these items do on their own (with the original manufacturers coat of paint). In reality, how long does the paint last on items that are kept outdoors? I think I usually see a max of one year before the paint fades on plastic toys if they’re kept outside, but this depends on the product and color too (more on that below).
So if it’s between getting a faded playhouse free or cheap and spending a few hours painting it, or buying a brand new playhouse for hundreds of dollars, I’d lean towards doing the work. You save a lot of money and if you have to repaint every couple of years, so what? It’s sort of fun and you can create a new unique toy each time you repaint. It’s fun for the kids and I enjoy it too.
I will say that wood items sometimes stand up over time better…. but that’s not necessarily true. They certainly can rot or end up with bees nesting in them. And I think a coat or two of paint here or there tends to extend their lives as well.
What do you think? Have you tried painting plastic? What was your experience?
Please share and pin this post!

Tips for Painting Plastic
Answering all the questions about painting plastic and sharing tips so it won’t fade or chip. Repurpose cat litter buckets quickly and easily with spray paint.
Materials
- Rust-Oleum 2x Ultra Cover
- Cat litter containers or other plastic items
- Rustoleum Primer
- UV spray
Instructions
- Be sure the plastic is free of dirt and dust.
- Spray the item in a well-ventilated area with a solid coat of the primer.
- Let dry.
- Spray the entire piece with 2-3 coats of paint, allowing it to dry between coats.
- Finish with the UV Spray.
Recommended Products
As an Amazon Associate and member of other affiliate programs, I earn from qualifying purchases.


Jessica
Monday 22nd of October 2018
Do you take the paint off when redoing it? I just got a free play house that is peeling because it has once been made over
Danielle
Monday 22nd of October 2018
If there's chipping paint, I definitely would sand. I didn't sand any of mine because they were the original toy that had faded (no chipping paint- I assume the plastic was dyed before it was molded).
Sondra Huckins
Friday 7th of July 2017
Did you apply a top coat to seal any of it?
Danielle
Friday 7th of July 2017
The playhouse is the only one with sealer. I used UV Krylon UV Resistant Spray Paint in Clear for that. Not sure it did much ;)