
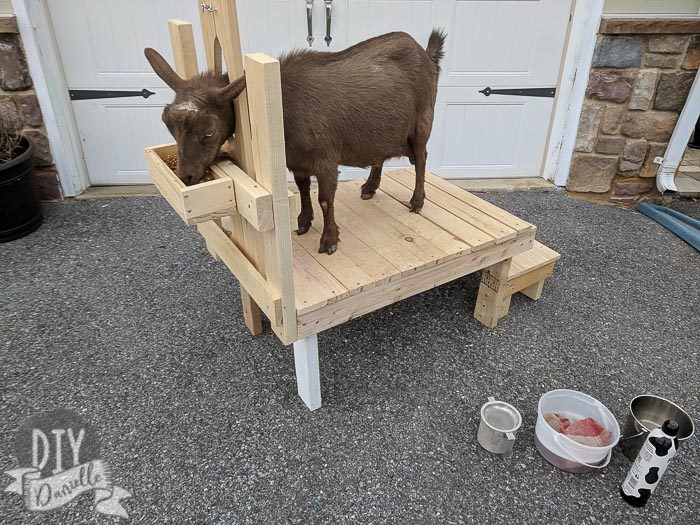
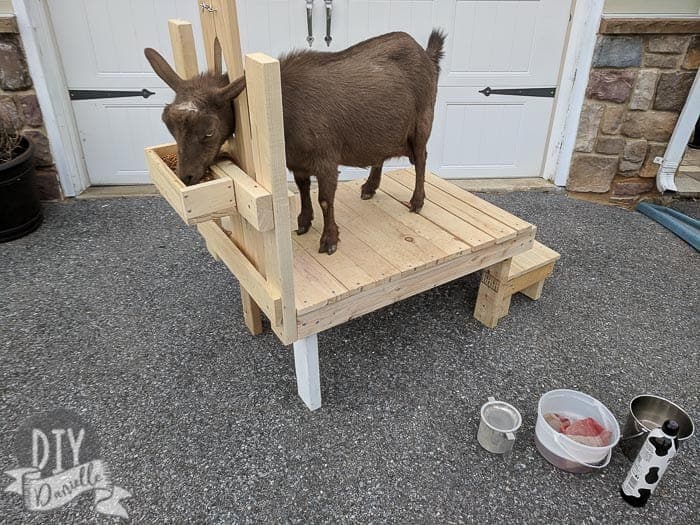
How to make a goat milking stand for Nigerian Dwarf goats. This milking stand has an attached step and seat in the back. There is also an attached feeder.
This post may contain affiliate links which may earn me commissions should you click through them and take certain actions. As an affiliate for Amazon, Cricut, xTool, Home Depot, and other sites, I earn from qualifying purchases. Please DIY carefully. View my full legal disclosures here.
Please read the whole post so you don’t miss any important information!
We brought home Nigerian Dwarf goats in February and I’ve had a whole host of related projects. We built a goat house, added fencing, created a wall mounted drying rack for my milking supplies, added an easy solar light to the barn, and learned how to pasteurize milk in the sous vide. Every time we mess something up (aka a goat escapes), we head out to fix it with whatever resources we have… to be honest, there’s been some zip ties involved which do the trick in a jam.
The big project that I needed finished BEFORE we took the goats home though was a milking stand. Our older doe was “in milk” and would need to be milked twice a day. I wanted to make it as easy as possible to milk her. A milking stand is much more comfortable and convenient for both you and your doe.
Prepare yourselves. This is going to be long because I added a stanchion, feed box, and step to this.
Supplies
More info on the length of the boards in the separate sections.
- Screws or nails
- 2x4s
- 1x4s
- Scrap piece of plywood
- Sanding supplies, screw driver/hammer, jig saw, saw of some sort, and all of that good stuff
- Hook for the closure on the stanchion
How to Make a Goat Milking Stand
Base Frame
Wood Cuts for the Frame:
- Legs: 2x4s, (4) 17″
- Sides: 2x4s, (2) 36″ for the long sides and (2) 20″ pieces for the short sides
- Floor of the Frame: 1x4s, (10) 24″ piece
- Additional 1×4 for center bottom of the floor, underneath (32″ I think).
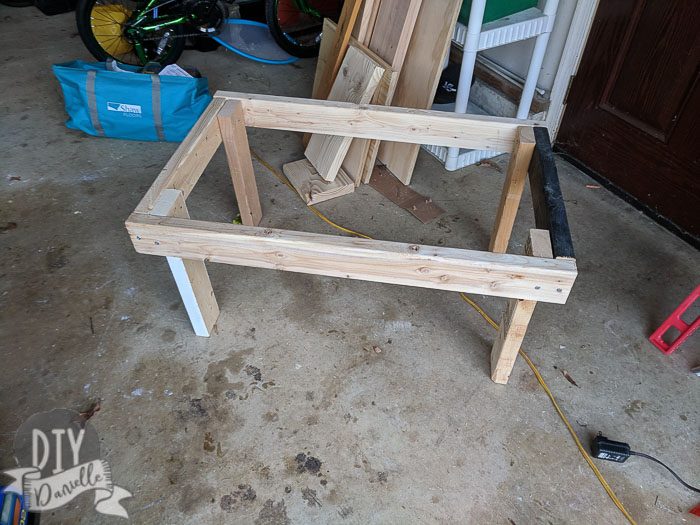
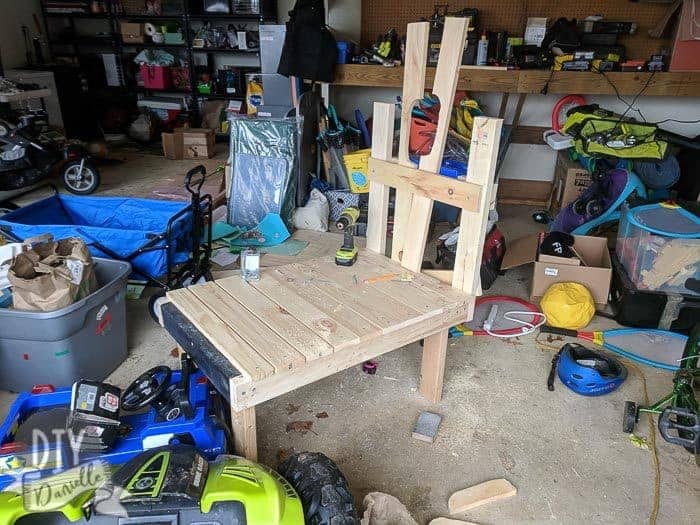
I started by creating the front and back pieces like this… you’ll be using (2) 17″ long 2x4s for the legs and (1) 20″ piece for the horizontal piece.

Then I added the two long sides. The trick to this is making sure you’re on a perfectly flat surface and to make sure they’re all even. I have no idea how or why it happened, but my first attempt the thing was wobbly. I moved some pieces around accordingly.
Ignore the painted pieces… I was upcycling pieces leftover from other projects. I like to be thrifty.
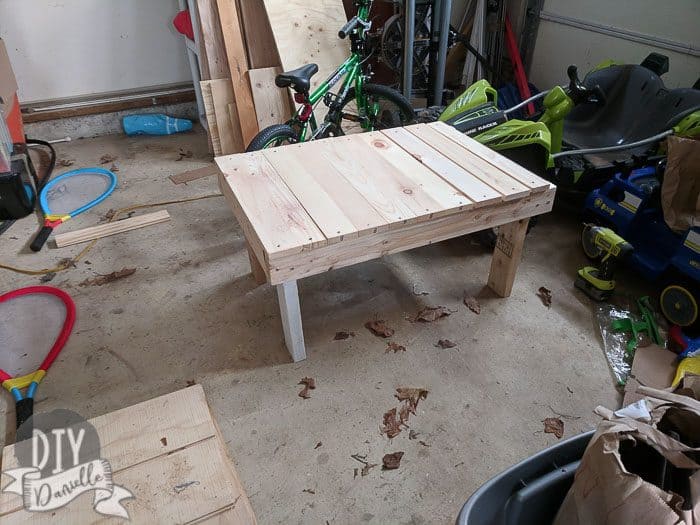
Once that was done, I added 1x4s on top of the frame to create the top. I added an additional 1×4 down the bottom middle in hopes it would provide additional support and prevent the boards from bowing over time. I’m not sure this would have been an issue, but it made me feel better.
I’m a “more is more” “play on the safe side” “overthink everything” type of girl. I believe this is 32″.
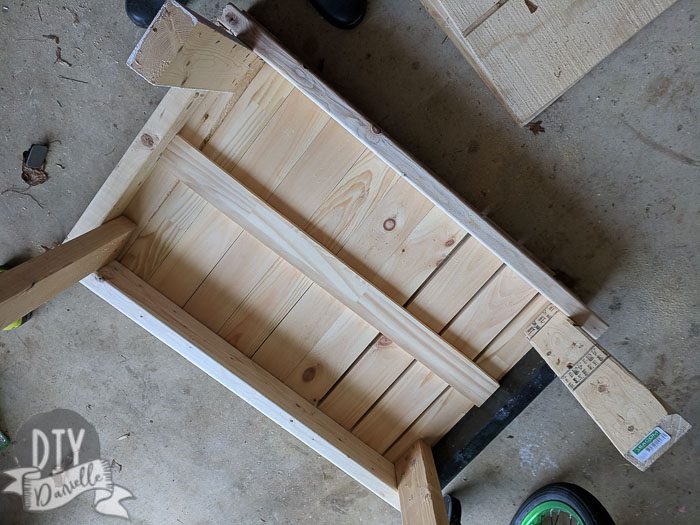
I spread the boards out at the end a bit. Don’t ask. I should have put them closer together- in my head, I thought poop might fall through, but my doe doesn’t really poop in the milking stand. She prefers to fart in my face, bahahaha.
Eventually I will put a mat on top of this. She seems to slip around a bit and I think I need something that has more traction for her. I’m just not sure WHAT to use… one feed store suggested stall mats, but those are super thick and heavy so they’re not ideal. Feel free to leave a comment if you have any suggestions!
I was told that I might want to give this additional support by screwing a wood support horizontally from the front leg to the back leg on each side. I may do this eventually, but right now it seems to be holding up pretty well.
Stanchion
Wood Cuts for the Stanchion:
- Head Piece, 1x4s: (2) 35.5″
- Supports:
- Vertical Supports are 2x4s, cut to 28.25″ tall
- Bottom horizontal support is a 1×4 that is 22 7/8″
- Middle horizontal support on the ‘feed side’ of the stanchion is a 2×4 cut to 22 7/8. The inside support is a 1×4 that is 22 7/8″.
The stanchion is the head piece. Some people use just a pole and tie the lead to the pole. I went with a head piece that closes around my doe’s neck. The important part is getting the correct height for your goat… if you have a taller breed, this part is higher. A shorter breed needs it to be lower.
Here’s a sketch I did of the stanchion with measurements sketched out. If it’s confusing, please leave a comment with any questions.
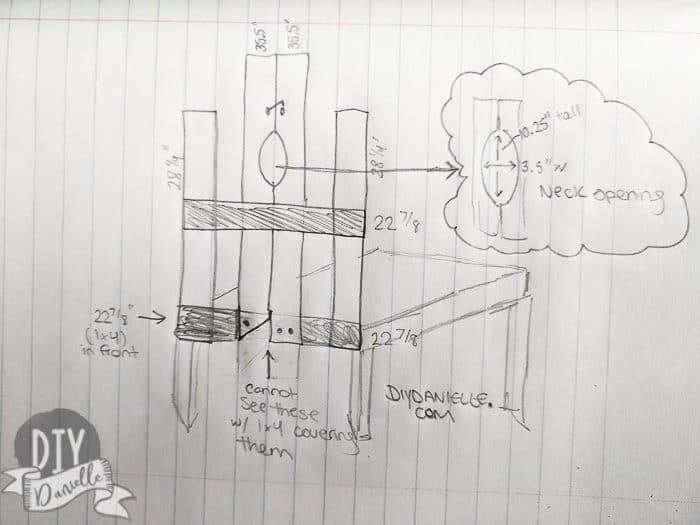
I started by adding a 28.25″ vertical board on either side. There’s a 1×4 that is 22 7/8″ at the bottom on the feeder side of those vertical 2x4s. Then there’s a horizontal 1×4 on the inside and a horizontal 2×4 on the outside, both are 22 7/8″. They’re placed around 17 3/8″ up from the bottom of the rectangular base (not including the legs).
Note that you may need to adjust the height of the middle wood cuts depending on the height of your doe. Mine is a Nigerian Dwarf goat. I had to adjust mine once and I redid my head lock piece too.

For the head lock area, I cut 1x4s into (2) 35.5″ pieces. I used my jig saw to cut an area for my doe’s head on the inside of each (as seen below).
The bottom of one of these pieces has an angled bottom on the inside (see sketch). This allows it to pivot nicely when placed snuggly against the other 1×4. You’ll screw the angled piece in with one screw (or a bolt/nut) and use two screws for the stationary 1×4.
For my Nigerian DWARF goat, the neck opening with both pieces side by side is 3.5″ wide and 10.25″ tall. The opening starts at 17.5″ up from the base bottom (not the legs, from the rectangular frame itself). You may need to adjust differently, depending on the side of your doe.
At the top, above where the doe’s head goes, there is a small latch to hold it closed while she’s being milked.
You need to plan to make adjustments if needed. After trying this out for a week (with different measurements), I ended up moving the horizontal pieces down slightly, then redoing the (2) 1x4s so the gap was slightly smaller. I cut the “oval” too big initially and she could pop her head out. I temporarily used pool noodles inside the curve to help prevent this, but it’s not an ideal long term solution.
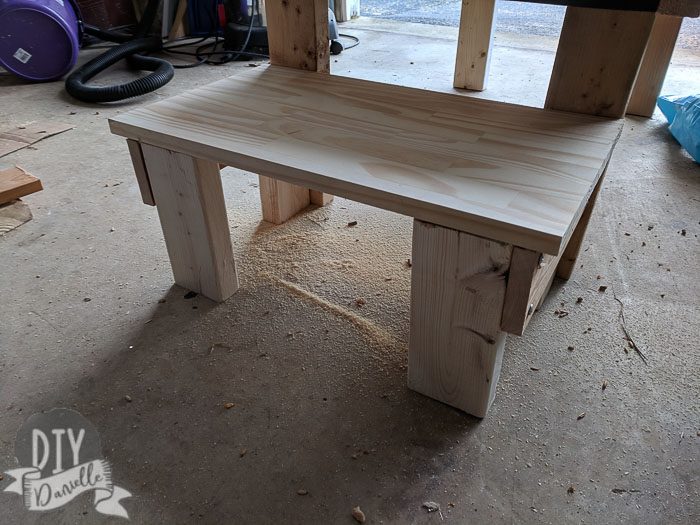
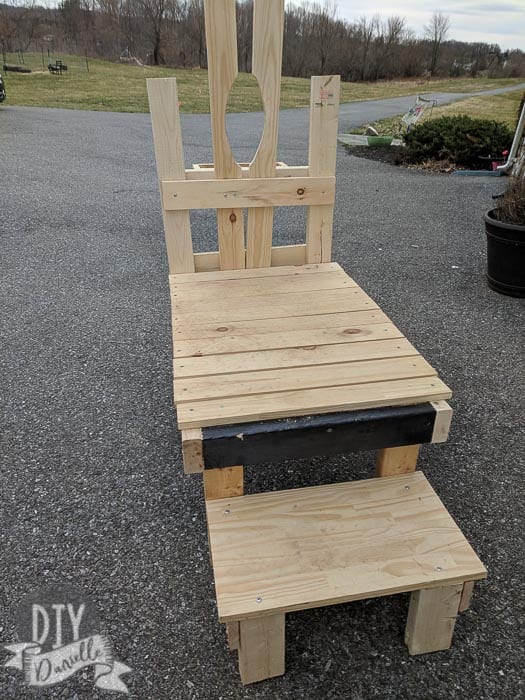
Step & Seat for Milking
The farm we bought our goat from had a milking stand that they made with a step for the goat / a seat for the person milking. I LOVED this so I decided to make my own. The goat never uses it… she seems happier to jump up. But I use the step as a seat while I milk.
Wood cuts for seat:
- (2) 11.25″ cuts from 1x4s for the sides of the step
- (4) 8 1/8″ cuts from 2x4s for the step legs
- (1) Plywood piece cut to 20 3/8″ x 11.5″
I cut some scrap 2x4s all to the same height for the legs (8 1/8″ each). I screwed a couple of 11.25″ 1x4s in place for the sides. Then I screwed the “seat” legs to the 2x4s for the main frame.
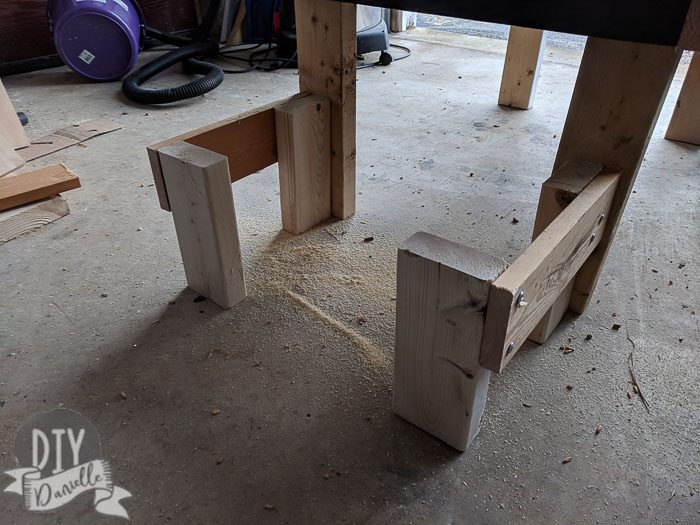
Then I just added wood for the seat. This is a scrap piece of plywood, I believe, that is 20 3/8″ x 11.5″.
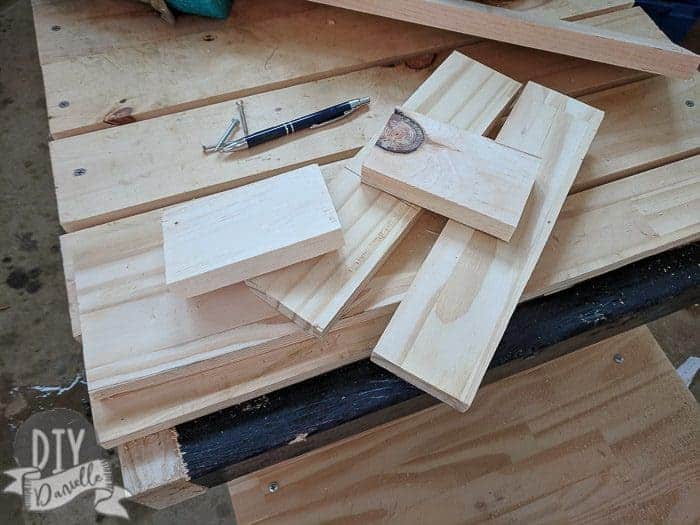
Feeder
Wood Cuts for Feeder:
- 1x4s:
- (2) 4.5″
- (2) 11 3/8″
- Bottom piece of wood cut to 12 7/8 x 4.5″
Initially I screwed on a big feeder from the store, but I found that it was way too large. My doe had trouble reaching all of the food unless I overfilled it. Then there was food waste.
I’ve heard mixed reviews of DIY attached wood feeders. A few goat owners mentioned that theirs fell off from wear and tear. I decided to whip something up quick and see how it worked.
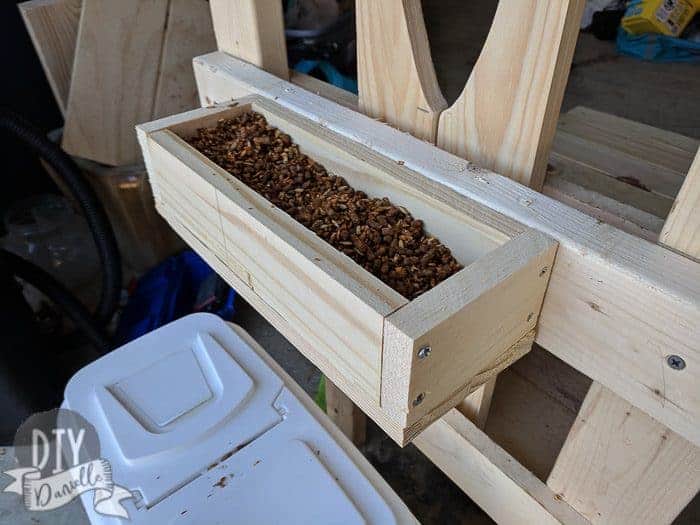
It’s LOVE. It works great, my doe can reach all of the feed, and the size of the container is perfect for the amount of grain she’s able to eat while I’m milking. It was totally accidentally because I just threw some wood together pretty haphazardly.
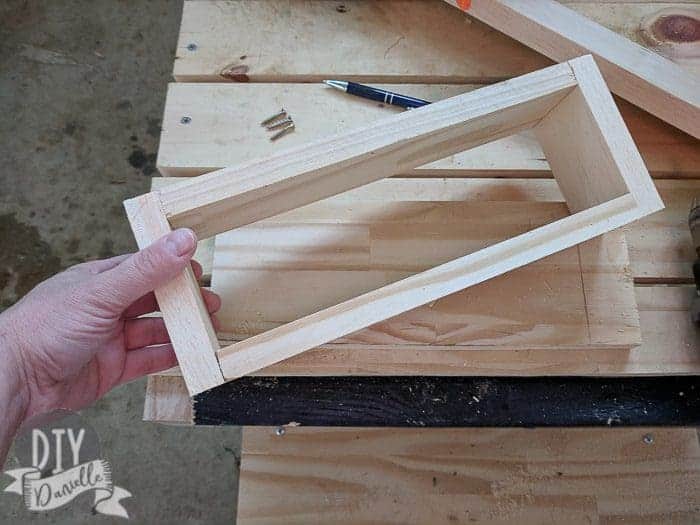
I started with four small 1x4s.
Screwed them together, then screwed a piece of wood to the bottom.
Then I screwed it into the 2×4 on the front of the milking stand. It’s great. I think I sanded it a bit first.
Final Thoughts on this Project
Overall, I’m really happy with the final product. I have a few thoughts…
- I may sand the corners in the back to be smoother/rounded, seeing I lean up against them a bit while I’m milking.
- For my Nigerian Dwarf goat, this could probably be a shorter length. I have to lean a bit to milk. But I’m loathe to fix that because then I’d need a different stand if I ever decided to get a larger breed goat too. But I might need a new stand anyways due to the head height. I don’t know! So I haven’t touched it. It’s mostly fine.
- I keep thinking about adding a rail on one side. If I do this, I might add a little storage box to place supplies. Most of my supplies are indoors being sanitized during the day, but I was thinking of a milking machine later one if I ever invest in one.
- I should probably paint this just to protect it. I like to wipe it down with a wet cloth daily and I’m not sure how it’ll stand up to long term use without a paint or stain/poly.
- My doe never uses the step. She jumps up on the stand itself. It might be worth making longer legs on the stand so it’s taller and lifting the seat up a bit too. That way you’re working at a better height for your comfort.
- I’ve been considering making the seat more narrow so I can sit forward. I usually sit with my legs to one side, seeing I can’t get comfortable sitting with my legs that wide, lol.
Buy a Milking Stand
No time to make your own? Buy a milking stand on Amazon.
Metal Livestock Stand | Wood Stand
Please share and pin this post!
Love creative homestead ideas? Check out these posts too: DIY Duck House | Goat Barn Accessories | Framing the Goat Barn | Siding & Roofing for the Goat Barn | Easy Solar Lighting for a Shed or Barn | Beginner’s Guide to Milking Goats | No Mess Duck Waterer
How to Make a Milking Stand for Nigerian Dwarf Goats
Learn how to make a DIY milking stand for goats with an attached step and seat. Plus, there's also an attached feeder.
Materials
- Screws or nails
- 2x4s
- 1x4s
- Scrap piece of plywood
- Hook for closure on the stanchion
Tools
- Sanding supplies
- Screw Driver
- Hammer
- Jig Saw
- Saw
Instructions
Base Frame
- 2x4s, (4) cut to 17″ for legs.
- 2x4s, (2) cut to 36″ for the long sides.
- (2) 20″ pieces for the short side.
- 1x4s, (10) cut to 24″ for floor 1×4 cut to 32″ for center bottom of floor.
- Build the front and back pieces using (2) 17″ long 2x4s for the legs and (1) 20″ piece for the horizontal piece.
- Add the two long sides.
- Attach 1x4s on top of the frame to create the top.
- Add an additional 1×4 down the bottom middle.
- Spread the boards out at the end a bit.
Stanchion
- Cut 1x4s (2) to 35.5″ for head support.
- Cut vertical supports from 2x4s, to 28.25″.
- Bottom horizontal support is a 1×4 cut at 22 7/8″.
- Middle horizontal support is a 2×4 cut to 22 7/8″.
- Cut inside support 1×4 at 22 7/8″.
- I went with a head piece that closes around my doe’s neck by adding a 28.25″ vertical board on either side.
- Use a 1×4 that is 22 7/8″ at the bottom on the feeder side of the vertical 2x4s.
- Add a horizontal 1×4 on the inside and a horizontal 2×4 on the outside cut at 22 7/8″.
- Place them 17 3/8″ up from the bottom of the rectangular base.
- For the head lock area, cut 1x4s into (2) 35.5″ pieces. Use a jig saw to cut an area for the doe’s head.
- Screw the angled piece in with one screw and two screws for the stationary 1×4.
- For my Nigerian DWARF goat, the neck opening with both pieces side by side is 3.5″ wide and 10.25″ tall. The opening starts at 17.5″ up from the base bottom.
- Add a small latch to hold it closed while milking.
Step & Seat for Milking
- (2) 11.25″ cuts from 1x4s for step sides .
- (4) 8 1/8″ cuts from 2x4s for the step legs.
- Plywood piece cut to 20 3/8″ x 11.5″.
- Scrap 2x4s all cut to the same height for the legs (8 1/8″ each).
- Screw a couple of 11.25″ 1x4s in place for the sides. Screw the “seat” legs to the 2x4s for the main frame.
- Add a scrap wood piece of plywood for the seat.
Feeder
- Cut 1x4s (2) 4.5″ (2) 11 3/8″.
- Cut the bottom piece of wood to 12 7/8 x 4.5″ from four small 1x4s.
- Screw them together and then screw a piece of wood to the bottom.
- Screw it into the 2×4 on the front of the milking stand.
Dean Van Deusen
Monday 25th of March 2024
Thank you for your design. I see that it seems easy to build and strong enough to work long term if it is sealed.
Jud
Wednesday 26th of April 2023
What was the approximate total cost of the project?
For traction on the platform, maybe use grip tape. It's basically a roll of sandpaper with adhesive on the bottom. It's the stuff used on skateboards.
Kelli E
Saturday 13th of May 2023
@Danielle Pientka, just made mine today! Used some scraps and screws we already had, but I’d say it didn’t cost more than $20! Thank you for this tutorial!!! I also added a hinge to the bottom of the food tray, so I could dump any residual food!
Danielle Pientka
Tuesday 9th of May 2023
I'm not sure, it's been so long since we made it... and I used a LOT of scraps, at least for the 2x4s. Annnnnd wood prices have risen astronomically since then.
Fran
Wednesday 14th of September 2022
Use paint for steps that has the sand in it to give more traction for the goat. Or, simply add squiggles of clear caulking.
Breia-lyn Mackin
Thursday 2nd of June 2022
What angle did you cut the bottom of the stanchion arm?