
How to make an easy reversible mouse pad using an upcycled yoga mat as a fun gift from the kids. You can use printable vinyl or permanent/outdoor vinyl for this project, as well as your Cricut or Silhouette machine.
Disclosure: This shop has been compensated by Collective Bias, Inc. and its advertiser. All opinions are mine alone. #LoveYourPC #CollectiveBias
Do you ever feel like your brain is working twice as fast as your phone or computer? I get that feeling all the time. Trying to juggle life as a work-at-home mom, I need quality electronics to make sure I stay organized and can complete tasks in a timely manner. A slow computer means more time working and less time with my family.
As you might guess, one of the things I enjoy is crafting and sewing. I use my computer to find and print patterns, to follow instructions from patterns, and to use my Cricut machine for cutting vinyl.
What you may not know is that I’m a huge geek and I enjoy technology and video games as well. I’ve played console games (make sure to check out my post on how to select a video game system for your kids) and I also love computer games. I play Minecraft with my 4 and 6 year old sons in “Mommy’s World” and my oldest loves to play Overwatch with me. And after the kids go to bed, my husband and I often try to enjoy an hour or two of game time together.
And as a blogger, my work is 75% computer work. Photo and video editing are awful to do on a slow computer.
So when I was invited to take part in a sponsored post about 8th Gen Intel® Core™ Processors, I jumped. I knew I needed to upgrade soon and for this post, I was able to choose between several different brands of laptops with the 8th Gen Intel® Core™ Processor so that I could find the laptop that worked best for my needs.
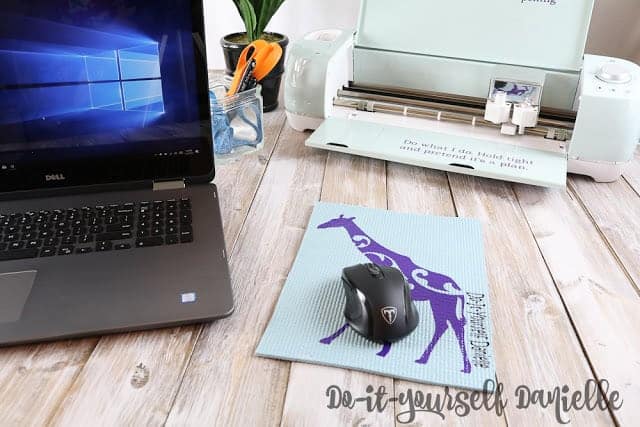
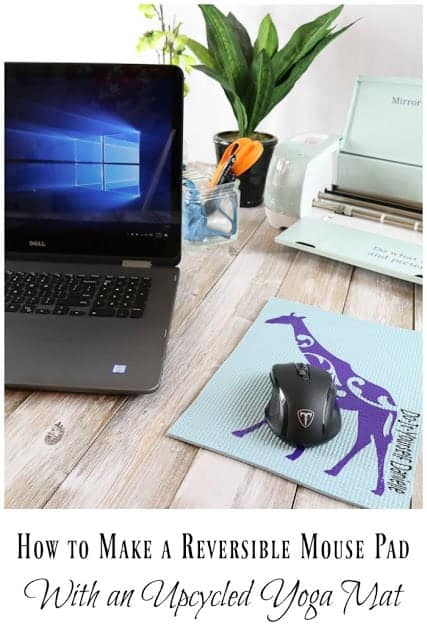
This post is split up into two parts- a tutorial on how to make your own reversible mouse pad using an upcycled yoga mat and a section with tips for buying a laptop. I’m using my new Dell Inspiron 7000 with my printer and Cricut Air 2 to make this mouse pad.
Use the Discount Code DIYDANIELLE on cricut.com for 10% off any cutting machine or heatpress (no minimum). Excludes: materials/accessories/mystery boxes/etc. Applies to US/CA only, code expires 12/31/23.
How to Make a Reversible Mousepad from a Yoga Mat
I initially had some fun ideas to make this reversible using fabric and cork, but my husband poo poo’ed my ideas by mentioning that the bottom of the mouse pad needed to be “sticky” so it wouldn’t slip and slide all over the desk. Whoops.
I was brainstorming and searching Home Depot to see if they had cork or something else that would work when I passed a display with yoga mats. I was making snarky comments in my head about how this was not the place I’d search for a yoga mat when I realized that yoga mats would be the PERFECT item to use for the mouse pads. And I had the perfect yoga mat to upcycle sitting at home. It was a $5 mat that I got a few years ago. I have a really nice yoga mat so I didn’t need it anymore.Yoga mats are perfect for this because they’re non slip, soft, and I like the texture. If you have a Silhouette or Cricut, you can do this entire project. If you don’t, you could STILL do this project if you have a printer and buy the printable vinyl. I didn’t use my Cricut for that side of the mouse pad.
Supplies for a DIY Mouse Pad
Supplies listed below may include affiliate links to the products.
- Cheap yoga mat
- Cricut Air 2 (or other cutting machine): I’m a Cricut ambassador of sorts so they sent me a machine early this year and I use it for *allllll* the projects.
- Permanent Vinyl (651 or Outdoor vinyl) for the giraffe or other design
- Printable vinyl if you want to do a photo.
- Transfer paper (if you do a regular design, this isn’t necessary for the printable vinyl.
- Scissors (I’d suggest paper scissors and not fabric scissors)
- Hair Dryer
How to Make a Reversible Mouse Pad

First, you need to cut your yoga mat into the shape you want for your mouse pad. This is really up to you. My store mouse pad was 8.5 x 11 or thereabouts, but my husband has a smaller square mouse pad.
Next, you want to cut and add your vinyl. I did this on each side with two different methods.
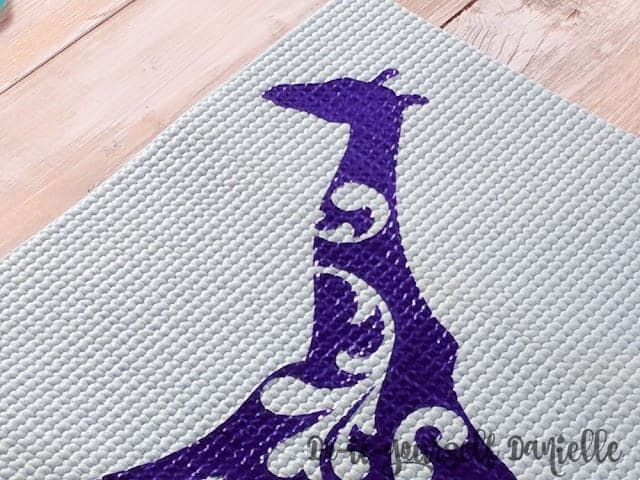
- Outdoor/651 Vinyl: I found an image in the Cricut store that I liked for my mouse pad. I added it to my project. Then I resized it for the size of my mouse pad. Cut it on your permanent/outdoor vinyl. Weed the excess vinyl away, then use your transfer paper to move the design onto your mouse pad. You’ll see that the vinyl doesn’t stick to the mouse pad perfectly. We’ll fix that in a moment.
- Printable Vinyl: On the opposite side, I wanted to put a favorite photo of me and my boys in the hospital after Tristan was born. Printable vinyl is sort of weird, but there’s no weeding involved. I uploaded my photo via Cricut Design Space, added the image to my project, then sent it to my printer. Make sure you loaded your printable vinyl already with the correct side down/up.This doesn’t need to ever go to your Cricut machine so you could make this even if you don’t own a cutting machine.Printable vinyl prints in one big sheet so you can trim off the white portion with scissors instead of sending it to the Cricut, then peel the vinyl off and transfer it by hand to your mouse pad. It’s super easy. You cannot use transfer paper for this. It will ruin your printed image. I’ll mention that my printer doesn’t like the printable vinyl so I don’t get a perfect image… but it was okay as the mouse pad still ended up super cute.
Once your vinyl is on, you need to make the vinyl stick to the yoga mat better. What you’re essentially doing is melting it to the mat. Now… I attempted to use heat transfer vinyl on one of these and the yoga mat melted. So don’t do that. No iron. No HTV. Just don’t. I did a quick search of the internet on how to apply vinyl to a yoga mat and found this great tutorial from my friend at Silhouette School. She’s got some great tips.
All I did was turn my hair dryer on high/hot and use it on my vinyl. While it was going, I was rubbing the vinyl into the mat. This worked perfectly. It does get really hot and if you get too close or stay on one spot too long, you can still melt your mat. To avoid this (and to avoid burnt fingers), I used my heat and rubbed the whole image on. I let it cool for 2 minutes. I repeated this 2-3x per side. You can visibly see when the vinyl melts into the mat so it’s easy to tell when it’s worked.
And now you’re done. I tried some lettering, but I found that it didn’t stick quite as well because the letters are so small. If you want to do lettering, you may want to use bigger and thicker letters, or print it on a piece of printable vinyl.
There are so many fun ways to customize this idea- it would be fun to have the kids color their grandparents a drawing for one side and do a photo for the other side!
Here’s a video of the whole process…
Tips for Buying a Laptop Computer
First, laptops aren’t as easy to customize as a desktop after the fact. Portability comes with a sacrifice. So when I buy a laptop, I prefer to get a top of the line computer so I don’t need to upgrade computers so often. This means knowing exactly what I need. I want to give you a really basic understanding of what you’re looking at.
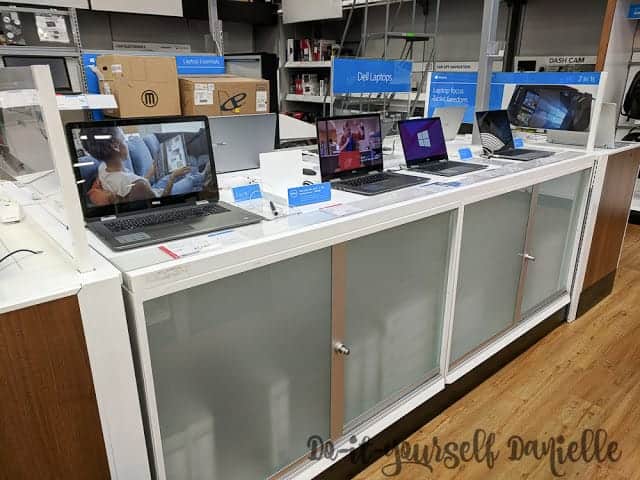
I made my purchase at Best Buy where I know many people like to shop for a computer (it’s so nice to be able to try them out in the store) so I want to hightlight items that they list on their in-store display card and explain how to ‘read’ them….
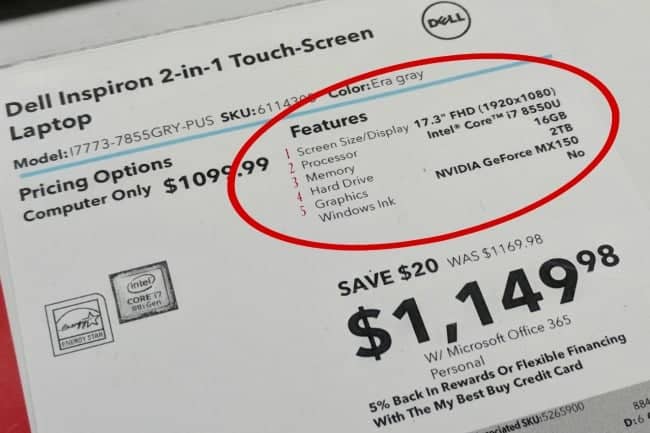
This is the card… I’ve circled the important part and each item is numbered.
1. Screen Size and Resolution
I don’t mind a smaller screen so much, but a large screen is a must have for my husband. What I did want, however, was a number pad and a large keyboard. If you game and stare at the computer a lot, the larger screen is really nice. A smaller laptop is awesome if you plan to travel with it a lot.
Resolution is the number of pixels on the screen. The more pixels that you can fit on the screen, the more detailed your image is. Higher resolution is important if you do a lot of photo editing or you’re trying to get the highest image quality possible.
2. Processor
Your processor is the most important part of your system. Having a computer without a processor would be like having a body without a brain. It’s the boss. It tells everything else what to do and how to do it. Also known as a “CPU” (central processing unit), this little device can make or break the speed of your computer.
Intel’s new 8th Gen Intel® Core™ processor is the latest and greatest. With higher processing speeds, you can finish tasks faster and easier.
Because it’s developed for the latest technology, you’ll be able to create, edit, and share immersive 4K, VR, and 360 content, work on multiple tasks at once, or you can even flip it into tablet mode to watch movies or TV shows with amazing quality. Have you tried the VR headsets yet, by the way?! My husband got a Oculus Rift last Christmas and they’re pretty incredible. It’s very sci fi which makes me happy.
3. RAM
If the hard drive is your long term memory, the RAM is your short term memory. It’s what you’re thinking about right now. The label on the Best Buy card calls this simply “memory.”
A higher RAM number means you can do more things at once. It’s the equivalent of being super mom. If only I was as cool as my computer.
You need a big RAM number if you are type of person who keeps multiple programs open at once… particularly programs for photo or video editing, video games, etc. which take a lot of computing power. I currently have Adobe Lightroom, MS Excel, Filmora, Adobe PDF, and Chrome- with 15 windows up- all running on my computer.
4. Hard Drive
The hard drive is where all of your files, photos, videos, and programs are stored. If computers were human, the hard drive would be it’s long term memory.
I was really torn with hard drives. Some of the 8th gen laptops have a solid state drive (SSD) which is faster than the older hard drives because there are no moving parts. But I found that I had two choices: a larger hard drive or a smaller SSD. I opted for the larger hard drive (2 TB) because I run out of hard drive space way too quickly due to all the video I take for my YouTube channel. Most people aren’t going to have that issue so I’d say go for the faster SSD.
5. Graphics Card
If you game, a good graphics card is important. The graphics card takes some of the pressure off the processor by doing the work of translating video data to be sent to your screen (monitor). It helps speed the whole process up. That said, it makes the most difference for gaming and it won’t impact regular computer use as much.
Other Features
Just a few more things to consider- do you want a DVD drive? They’re not standard anymore so you’ll need to make sure the one you buy has one if you need it. USB drives are a lot easier now so I imagine DVD/CD drives are mostly unnecessary. You can always buy one that plugs into your computer (external drive) if needed.
Many computers are now built to be 2:1 so you can fold it to use as a tablet. This is a pretty neat feature. Some accept voice commands and some let you draw on them with a pen. The pen feature (Windows Ink) is one thing that my computer lacked, but I wasn’t willing to sacrifice other features for that one.
As for software, you need to know what you want to use and if the computer will have the processing power necessary to use it. Intel’s new 8th Gen Intel® Core™ processor is going to handle any PC product you want to use at this point.
Personally, I went with the Dell Inspiron 7000 (it looks like this is currently on sale too!). I like the Dell brand and the machine had all of the things most important to me. And the 8th Gen Intel® Core™ Processor meant that it could handle all of the tasks that are required of me.
Any suggestions on a name for her?
If you love this post, make sure to pin and share it!
Many thanks to Intel for sponsoring this post!

Thanks for taking the time to read this post! I really appreciate the time you’ve taken. Please share, like, and pin my post if you enjoyed it. Follow me on social media and subscribe to my email list to keep up to date on all of my latest projects!