
How we used MDF with wood trim to create bookshelves for our DIY entertainment center.
This post may contain affiliate links which may earn me commissions should you click through them and take certain actions. As an affiliate for Amazon, Cricut, xTool, Home Depot, and other sites, I earn from qualifying purchases. Please DIY carefully. View my full legal disclosures here.
Please read the whole post so you don’t miss any important information!
We only bought the supplies for cabinets and base originally so now Daddy B had to run back to the store for more supplies. We picked up approximately $427.05 worth of supplies for this part of the project, but it’s possible there’s other stuff lumped in there as well. It was hard to separate out costs for things like the wood where we were using it for different parts of the project.
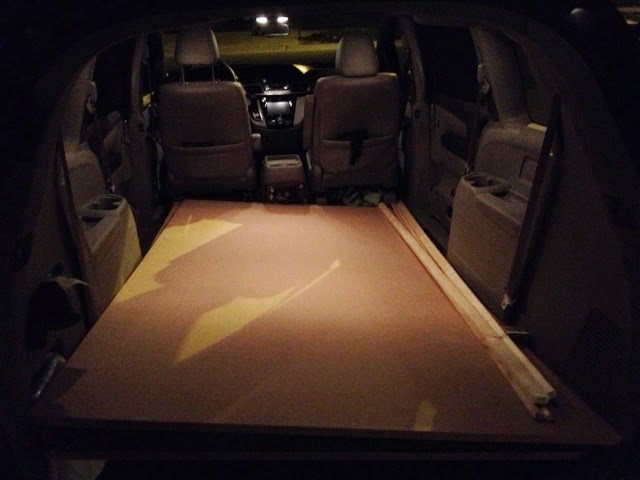 |
| Glad we have a minivan. This was only one trip worth. |
Here he’s using tape to mark where he plans to put the tv and bookshelves so he can get a good idea what to buy for supplies. We have tall ceilings so he had to measure with that in mind. Note all the hardware on the wall to prevent furniture from tipping, eh.
Glad we won’t need that with these.
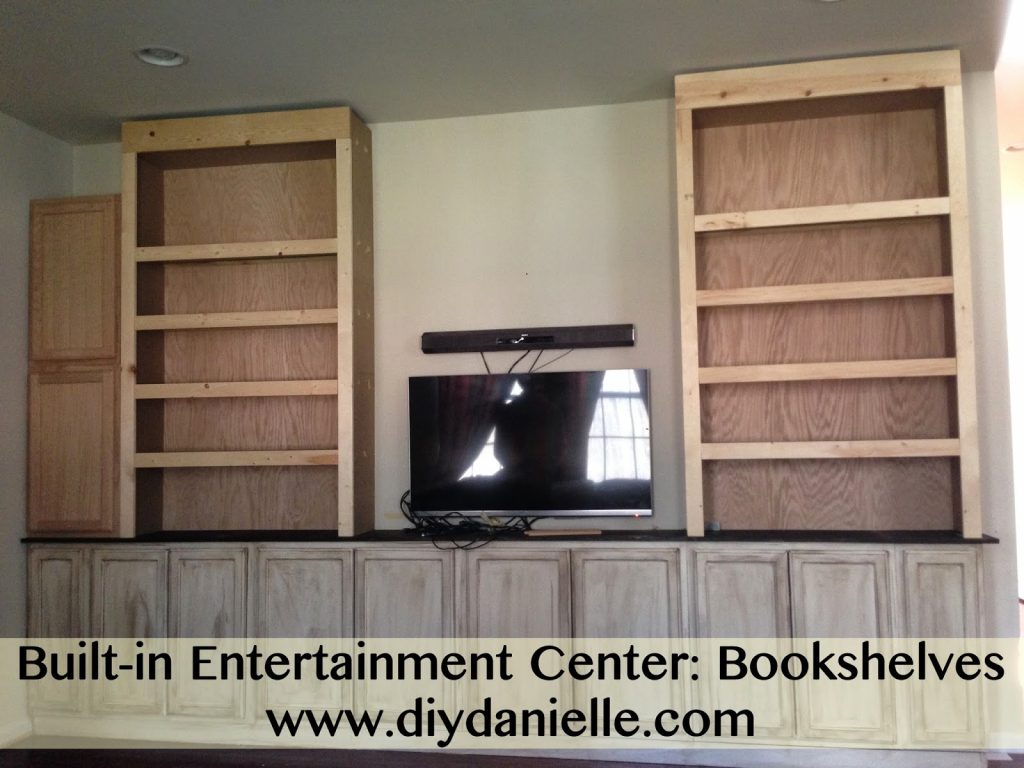
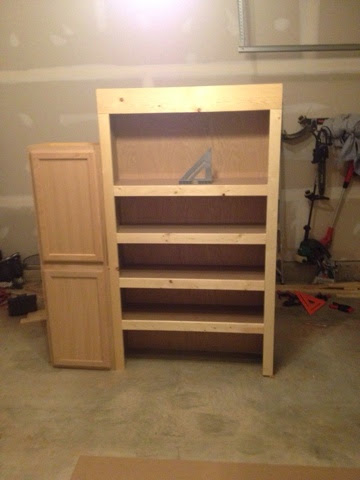
To get the correct size across, we did two big bookshelves, then added two more cabinets on left side.
Costs
- (2) 30x18x12″ Oak Single Door Kitchen Wall Cabinets: $122.00
- Wood and such: $427.05
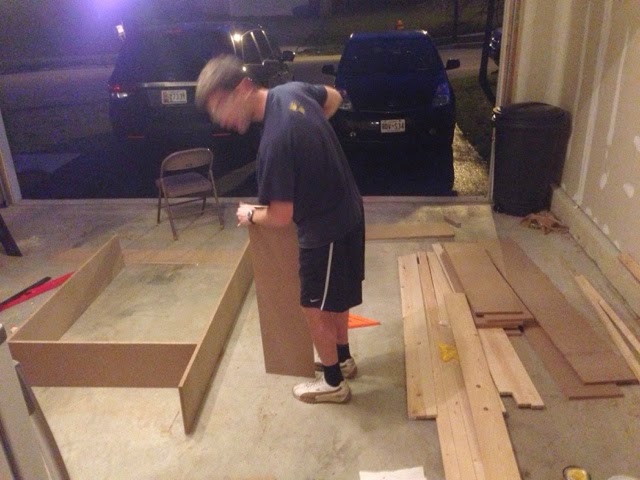
He did need a nail gun for part of this, but my neighbor let us borrow his. That saved money.
We’re parents so we don’t have much time to get to these projects so a lot of this was done post bedtime. I can’t begin to explain how terrible our kids sleep so this took my husband a while to work out how he wanted to do this so they’d be sturdy. These are really huge because we’ve got 9′ ceilings and we wanted them to go all the way up.
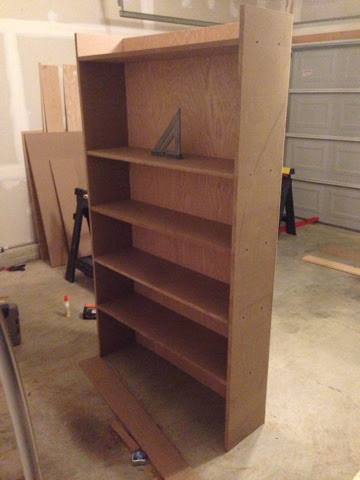
The majority of the shelf is MDF, but then he used wood to surround the edges.

It’s pretty vital to make sure the shelves are level.
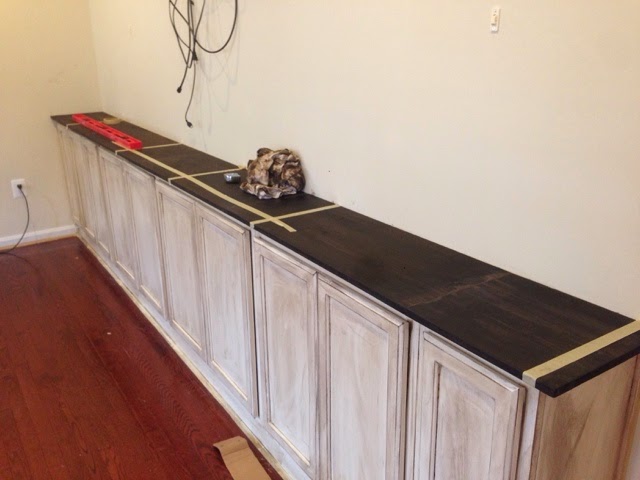
When we were ready to bring the bookshelves in, we used wood glue to glue down the countertop on the cabinets first.
Then we had our neighbor, Sky, help us lift them up. Brandon used these thingy mabobs to hold them in place.

Then I painted and distressed. Painting these mo’fo’s was NO JOKE. It’s a lot of work. Lots of crevices. There is the tops, sides, underneath and bottoms of each shelf. Distressing made it more work. However, I’m glad we distressed because it’ll hopefully hide the flaws our inexperience may have brought to the project. I taped a little to prevent paint splatters but mostly used the ” be careful” method of painting. Moderately successful, I’d say.
Below Photo: Two coats of paint (left) vs. one coat of paint (right)… I didn’t paint the ends because instead I painted another piece to glue/nail on over those sides. I did a total of two coats of paint for everything besides the very inside of the two cabinets which I didn’t paint. The painting/distressing was the same as I did on the bottom cabinets.


Here’s the final picture of the bookshelves distressed (left) vs. right (to be distressed later). You’ll get to see them all finished at a later time. Sorry, no spoilers!

There’s plenty more of this project to come, including electrical, lighting, and the final reveal!
Note: We added the side pieces once they were painted, as well as trim to the top. You’ll get to see that in one of my later posts.
This project was initially inspired by the one done by Addicted2Decorating.
My other posts on this project can be viewed here:
- DIY Entertainment Center (Final Reveal)
- Cabinets with a base for the bottom of the entertainment center
- Adding a pine wood countertop
- How we added wiring for the television and game systems
- DIY under cabinet lighting
- How to distress the entertainment center for a farmhouse look
When we did this project at our new home, we decided to use pine boards instead of MDF. Visit this link to see our DIY Pine Built In Bookshelves. You can also see how we used floating cabinets for living room storage.