
Blog Transfer #17: DIY Plumbing
Originally posted on March 11, 2012
Just a friendly disclaimer… I am NOT a plumber… I just try to fix things if I can do so without causing any harm. I would probably just skip any information I provide actually, and go read the links that I’m providing to better resources because I’ve made some frightening mistakes in my past, trying to fix or clean things. But maybe this will be helpful to someone else anyways… I did not get electrocuted during either of these projects so that’s a good sign.
Bathtub Drain DeClog
About two or three years ago I had to pay a plumber to unclog my disgusting bathtub drain… I have long hair so it always gets clogged, no matter how hard I try to avoid this problem. I believe it cost me a couple hundred dollars to get this fixed so now I hate calling a plumber. Electricity scares me so I’ll pay for problems related to that… but despite being a tad OCD about grossness, I’m too cheap to pay for something I can do myself. Plus I don’t really like strangers dealing with my grossness. As a result, my husband and I decided to tackle the current drain clog that popped up “overnight.” My post pregnancy balding has destroyed our drain. Disgusting.
Daddy B tackled this project for a while and was ready to give up and call a plumber, but I “encouraged” him to continue. There’s a tutorial for pretty much everything on the internet now so if other people look up how to build bombs, surely there must be good tutorials on how to unclog drains! And there are!
Here’s some resources that I found useful:
- I will likely use this tutorial from Ask Anna as regular maintenance from now on, but it also works for unclogging drains.
- This was my favorite link from DoItYourself.com
- And this is from WikiHow
We started out by just trying to get the clog out with a hanger, but we couldn’t reach the clog. We used the boiling water and baking soda. We filled the tub with some water, then used the plunger 5-6 times or more at a time as well. You need to make sure to plug up the other drain (the one that drains excess water) while you do this to create better suction… Daddy B stuffed a bunch of rags in the hole, but put the hanger in too in order to keep the rags from getting stuck in there. It would be embarrassing to fix the clog, then have to have the plumber come to remove the rags from the drain so it’s good he thought of this. I’d be desperately trying to get the rags out right about now.
Nothing seemed to be working perfect so here’s the order we worked in that finally did the trick (I do recommend trying to grab the hair/clog out first if it’s near enough):
- Remove all drain pieces… screwdriver required.
- Plug up the other part of the drain (the excess water drain thingy)
- Run hot water to fill the tub just enough to cover the plunger.
- Plunge like crazy. Do it more. Add some water here and there so that your plunger isn’t dry.
- Run hot water down the drain again, adding a generous amount of baking soda after turning the water off…. some of the baking soda washed down the drain and some stayed at the top.
- Added white vinegar to the drain… this is SO COOL! I never got to do those fun volcanos in school so this was a great fun science experiment for me. Get the kids involved!
- Leave this to sit.
- In the meantime, boil some water. After 15-20 min of the drain sitting, pour this down the drain.
- At this point, your drain should hopefully be feeling better. I’d probably repeat it a couple times before calling the plumber if it doesn’t work though…
This is how I decide when to call the professionals (unless it looks like my attempts to fix it will result in disaster, ie. electricity):
Cost of Hiring a Professional · My Hourly Wage = Number of hours I invest before paying someone
Cost of Hiring a Professional · My Hourly Wage = Number of hours I invest before paying someone
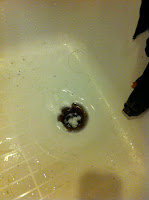
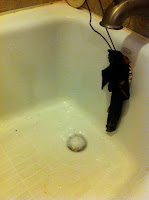
Disgusting Photos, for your enjoyment…. everything’s better with photos right?
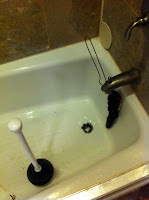 |
| Baking Soda going down the drain |
 |
| Some baking soda still sitting on top of drain |
 |
| Pouring vinegar down drain |
 |
| Vinegar explosion |
To give credit where credit is due… Daddy B did most of the hard work. But it started draining correctly once I got involved… pure dumb luck.
Sort of like when you spend an hour trying to open a jar, just to hand it to someone else and they pop it off in a second.
I hate being the person who gets it on the first try, after the other person did all the hard work. I always feel like a huge ass.
Toilet Handle Fix- Do you need to hold the handle down to get your toilet to flush?
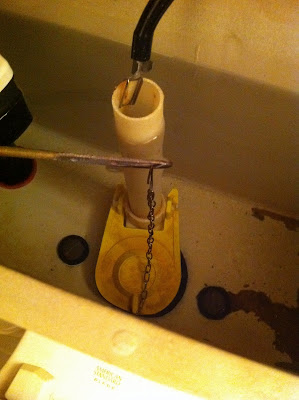
This was something simple that I figured out last year. My toilet handle needed to be held down to flush completely and it got to be frustrating, especially seeing that guests didn’t always realize that. If you take off the top of the toilet tank and look in, you’ll notice that there is a chain that attaches from the handle to the drain itself. I believe all of these parts can be replaced pretty easily with pieces from the hardware store, but for this project all I needed to do was shorten the chain. I adjusted the chain to be the correct length and then experimented with each length to find the perfect fix. This took me 15 minutes max and my toilet has been doing great since then. I was a little disgusted with myself afterwards because it was so easy and I’d been putting up with that little annoyance for the past few years. Make sure that you test it thoroughly before considering yourself finished though- you want to make sure that the chain is the appropriate length so the toilet isn’t always running all of the time.
If you check out the picture on the left, this is what the inside of the tank looks like and you can see the chain. The top part of the chain has a hook that inserts into the long bar. If your toilet will no longer flush, sometimes it’s because that part has come off or broken off. You can replace it pretty easily… you may even have something around the house that’ll work (this may not be awesome because different materials may not work well inside the toilet tank, but it might be a good temporary solution until you can buy a replacement chain/hook). To shorten the chain, it’s common sense- just make the chain shorter on the hook.The first time I opened up a toilet tank, I was pleased to find that it wasn’t nearly as disgusting as I’d imagined. So dive on in.
Here’s a couple links if you don’t want to take my word for it (I’d understand):
- Toilet Not Flushing
- Video on Fixing a Running Toilet– DIY Network
- DIY Toilet Repair List– DoItYourself
Darryl Iorio
Thursday 11th of April 2013
Your post was very informative! I know basic plumbing and I must admit that your knowledge was more advanced. Like you, I've been using natural cleaners, which I found to be effective as opposed to chemical-based ones. Keep sharing your DIY plumbing ideas! Thanks!
-Darryl Iorio