Blog Transfer #1: January 22, 2012
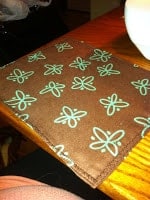
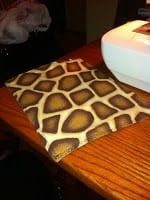
One thing that I’ve discovered this pregnancy is that I can sew! I got to about 30 weeks along and decided that it’d be ‘fun’ to learn to make my own cloth baby wipes for the baby, instead of buying them. Simple project. I pulled out the sewing machine that I bought in 2004 and used it for probably the 2nd time. I’m a bit impulsive about starting new hobbies and I am glad that this one has actually worked out. It was touch and go for a while there, and Brandon found it amusing to listen to me swearing at the sewing machine. It took me about 5 hours to figure out how to thread the machine normally, as I originally couldn’t figure it out and decided that the best way to do it was to remove the screw and cover. I haven’t quite figured out how to use patterns yet, but if I find a good DIY website then I can pull off most of the projects. Sometimes I read their directions, don’t bother with the actual pattern, and just try to make my own pattern. I have no idea how, but this has been actually working for me. Upon close inspection, I’m sure my projects aren’t much to be proud of if you’re looking at technique or how straight I can sew, but most people don’t inspect closely. Phew.
Here are some projects that I’ve completed so far:
Two Ply Cloth Wipes: Cut out 8×8 squares, sew together inside out on three sides, flip it, then stitch around the outside of the wipe with a pretty stitch. Pretty stitch optional. Didn’t use a pattern for these.
I store these dry, and have a spray bottle with wipe solution (mix of water, olive oil, tea tree oil drops, and baby soap) that we will spray the wipe with prior to use. We may tweak the solution as we see how our baby responds to it. I’ve heard that plain water is just as good.

Check out Amazon.com for some good deals on flannel fabric.
If you don’t want to make wipe solution, you can purchase premade solution, such as Thirsties Booty Luster (I love the name).
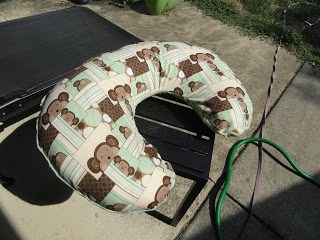
Boppy Pillow Cover: We found a used Boppy Pillow at a yard sale for $5 and I decided to make my own cover for it. I really liked the cover it came with, but I wanted an extra cover as well. I found this tutorial from VanillaJoy, but there were a lot of sites that offered patterns for these. The patterns I found all seemed to use zippers and I wasn’t quite comfortable trying to put on a zipper so I added velcro instead. If I could go back to do it again, I’d have added a little extra fabric when making the back part because it was a little snug to add velcro.
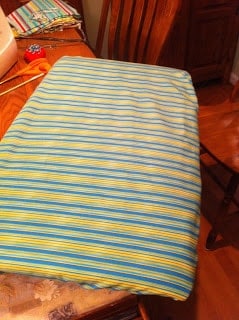
Fitted Sheets for Arm’s Reach Co-Sleeper: We got an Arm’s Reach Mini Co-Sleeper so that we could safely co-sleep with Baby G. These are great and work up until 5 months or so. They hook to the side of the bed so that you don’t need to worry about them being knocked over by dogs and Baby G is so close that I can reach over to take him into the bed with us to nurse during the frequent nightly feedings.


The extra sheets for them seemed a bit pricey to buy so I decided to make them myself. Plus, it was fun and kept me occupied. I didn’t find a pattern online so I decided to wing it. I took out the co-sleeper pad, used paper bags (taped together) to create a pattern by tracing around the pad and adding enough for the back of the co-sleeper pad too, and then used the ‘pattern’ to cut out the cloth. I think with this one I just sewed a little edge around the whole thing, slid an elastic through it, then sewed it up. Then I added the velcro to the ends/sides in the same manner that the original cover was made. I didn’t get great pictures of this because I kept the other cover on underneath as I was still trying to determine if everything ‘matched’ well enough. I ended up making two covers in the end… the second is a bit nicer.

Update: In January 2012, I decided to make a fleece sheet too for the colder weather. It’s much nicer for Baby G because the bedroom gets kinda cold in the winter and I don’t need to warm up the sheets before I put him to bed.
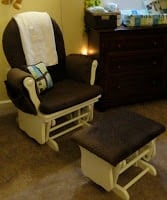
Reupholstering a glider and ottoman: This was my biggest project. My friend gave me her old glider and ottoman (thanks Michelle!), and suggested that I might want to reupholster it. I think I sat there staring at the pads for a really long time before I dared to start cutting fabric. Similar to the fitted sheets above, I made my own ‘patterns’ for the cushions. Then I just cut the fabric out, sewed it together, and used velcro (also brown) to make the cushion covers removable. I had to get creative with some parts of this. It came out looking pretty good though. I love the fabric because it’s soft (I think this is minky fabric), but I am concerned about how it will wear in the long term. That’s fine though- I guess I can just make new covers! Next time, I’d like to add additional padding to the seat. I wasn’t quite ready to tackle that when I did this. The ottoman just involved using a staple gun to put the fabric on.
 |
| First Try |
 |
| Second Try |
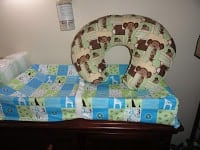
Changing Pad Covers: My first attempt wasn’t great as I wasn’t trusting the patterns/tutorials that I found online because our changing pad appears to be slightly thicker than the average changing pad. I eventually decided to use the tutorial on Prudent Baby to help me make it, and the second attempt was much nicer. I may have added a little extra cloth on each side to accommodate for the extra thickness of the pad, but I think it was fine regardless.
 |
| Beautiful Book Slings |
Book Slings: This is my favorite, FAVORITE thing that I’ve made for the room. I found a bunch of tutorials for these, and used the Ikea towel rods as suggested by RookBlog. I also liked the tutorial on Penny Carnival. I can’t find the tutorial that told me how to size the smaller sling though for baby books… it’s out on the web somewhere. I’ll update if I find it!
This project was pretty easy. I had to make it slightly more complicated by attempting to use scraps from the bedding set (the bumpers, which we won’t be using on the crib) to make the bottom sling. I picked matching fabric for the top sling as the bumpers wouldn’t work for the top one, given it’s smaller size. I’m still not sure how I feel about the bottom sling not being as long as the Ikea towel rods, but it didn’t look right to add fabric or to use parts of another panel from the bumper.


You’re looking for a towel rod or double curtain rod that looks a little like this:
Drawer Dividers: I used this tutorial from DesignSponge, but used the wrapping paper on the cardboard instead and I had to do the measurements for these specific drawers. I think it looks pretty cute for something that cost me ZERO dollars to make.
And that is the bulk of my projects so far for the baby room.
